Project Car
Project: Replacing the Timing Belt
After the bulk of the cooling system replacement work was finished, I went and took most of the cooling system back out in order to start the replacement of the timing belt. Though the procedure to perform this is not very difficult, the risk to the engine paired with my lack of experience made me regret taking on this task so early on. Regardless, I got everything done properly and without damaging anything, albeit several weeks and many stressful days after starting.
- Timing belt
- Tension bearing
- Tension bearing bolt
- Water pump
- Water pump gasket
- Water pump to heater pipe gasket
- Coolant T outlet gasket
For some reason, I didn't take a ton of photos when going through this, but I've included the ones that I have and some from other jobs that could be helpful.
Remove Cooling System
The beginning of the replacement starts with the removal of the radiator and coolant hoses. This is described with images on the cooling system replacement page. I repeated all of these steps to remove what I had put in previously.
Remove Serpentine Belt
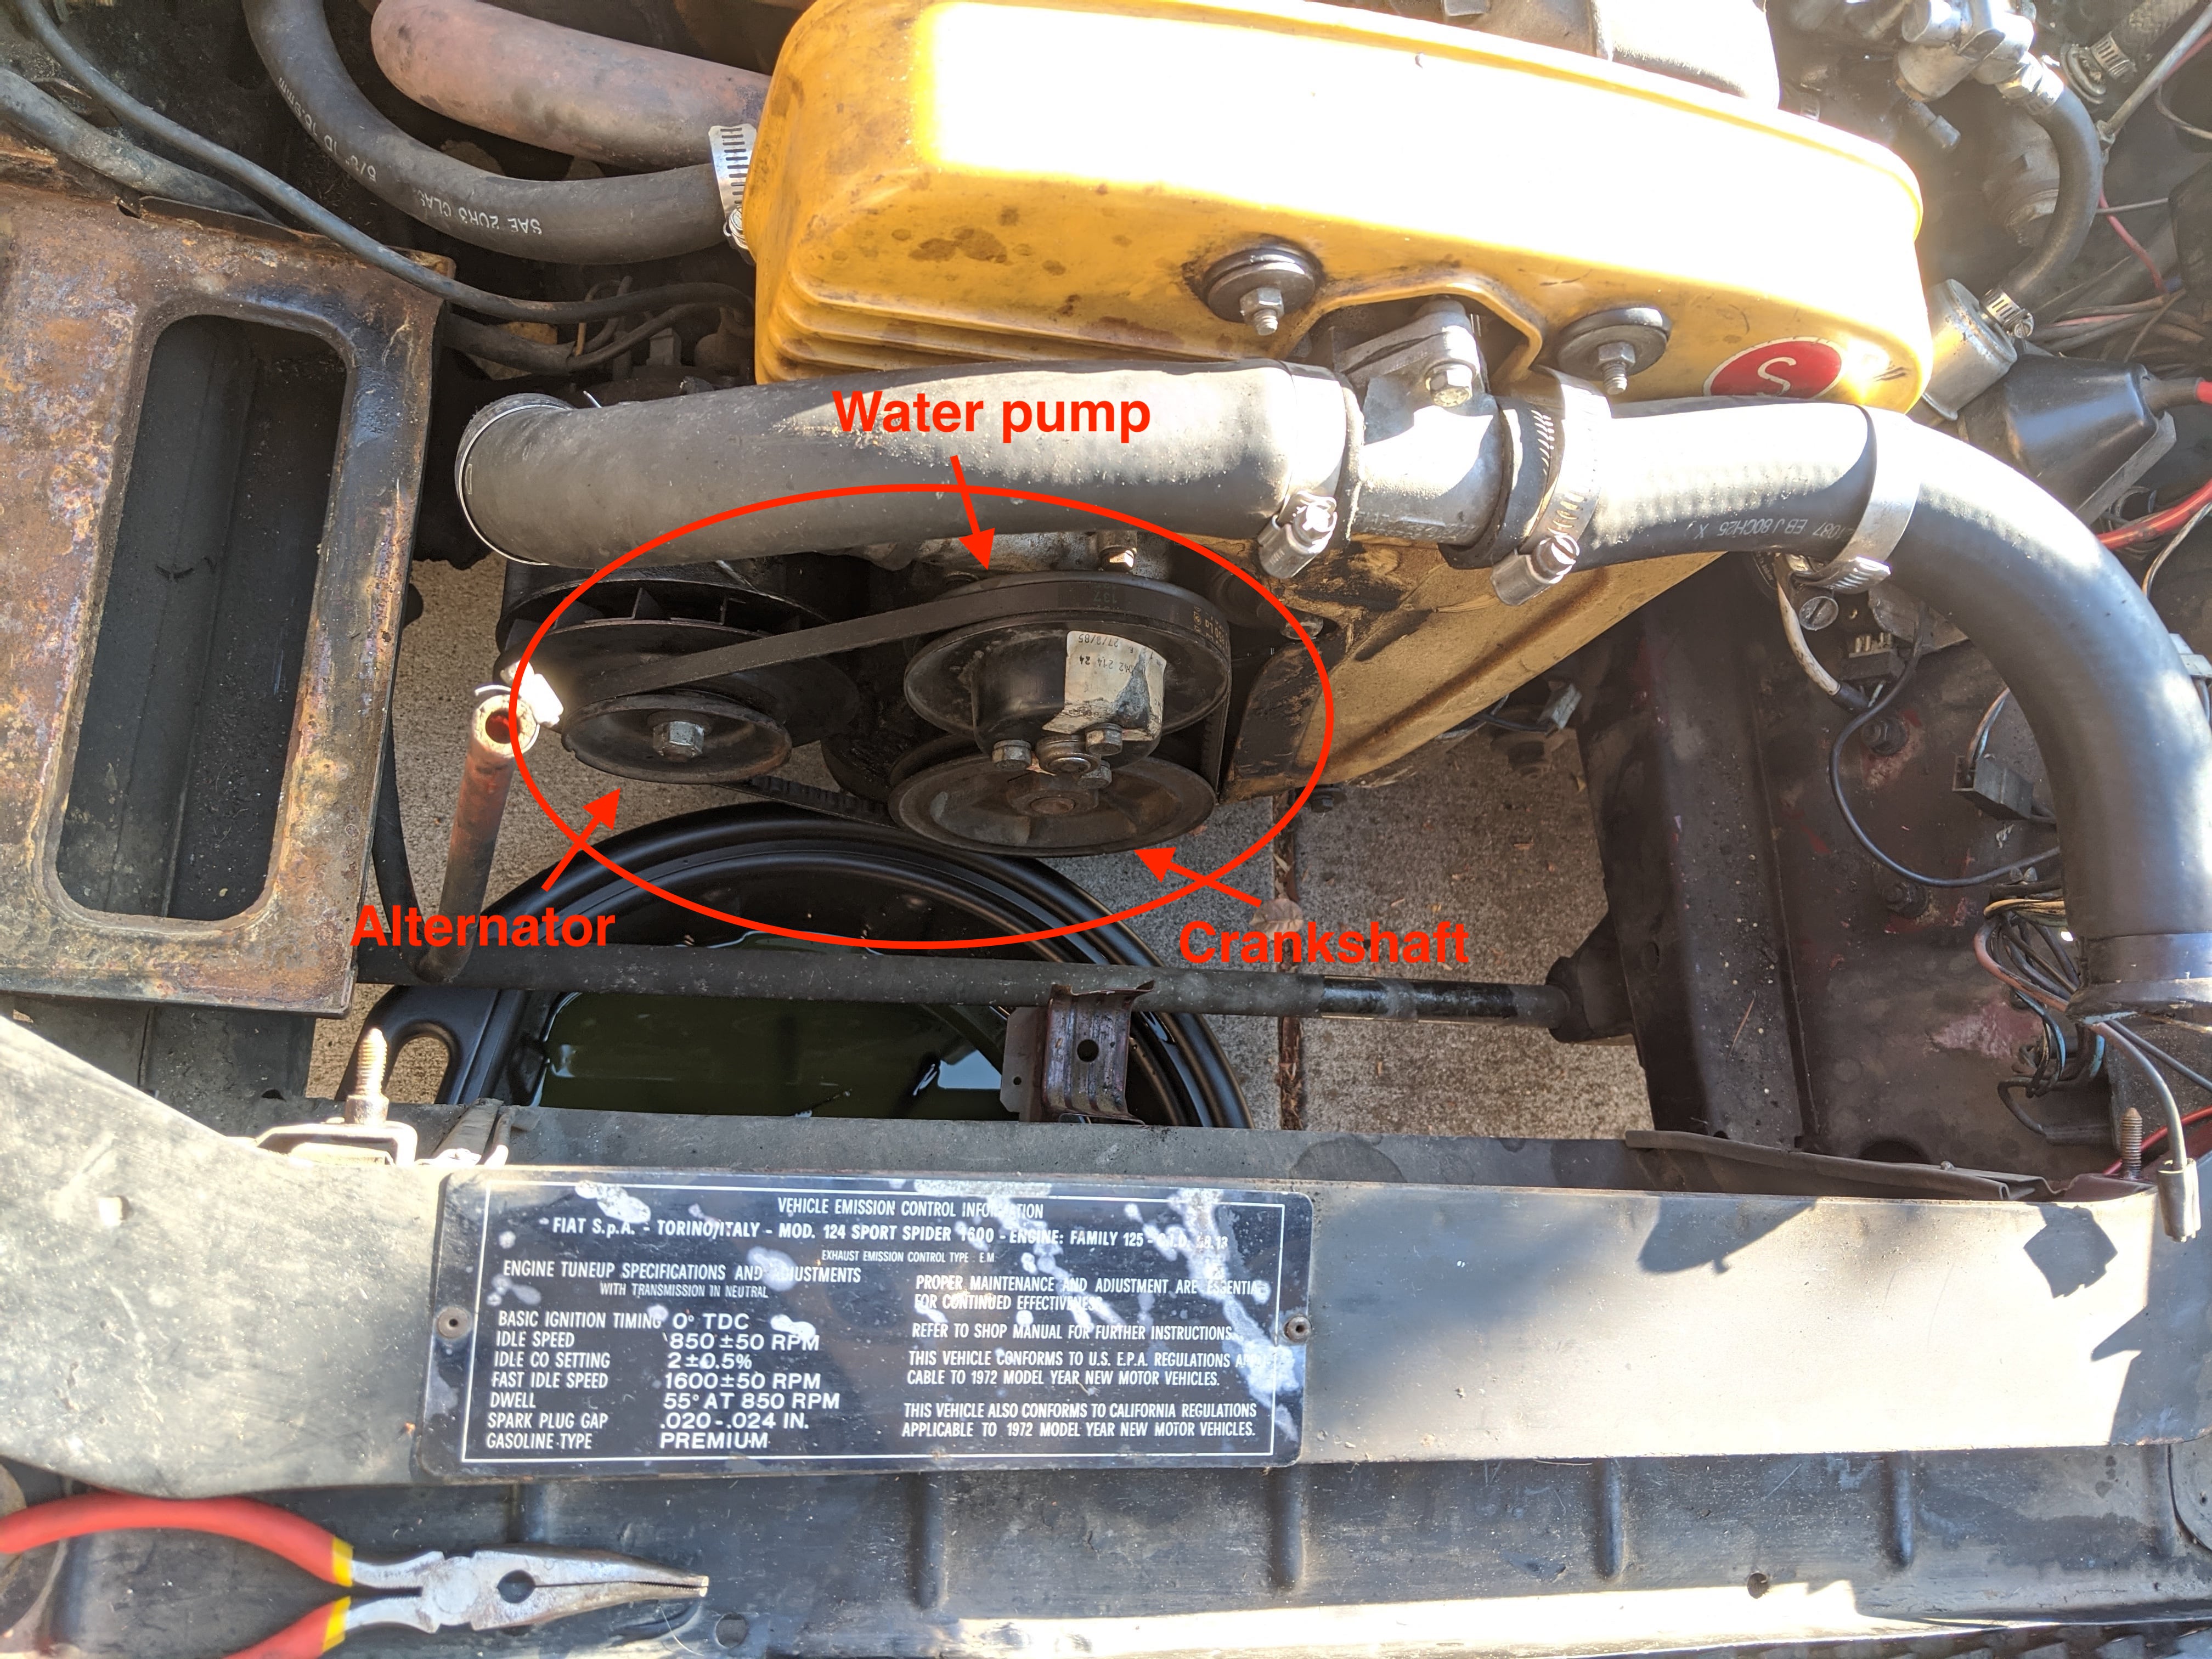
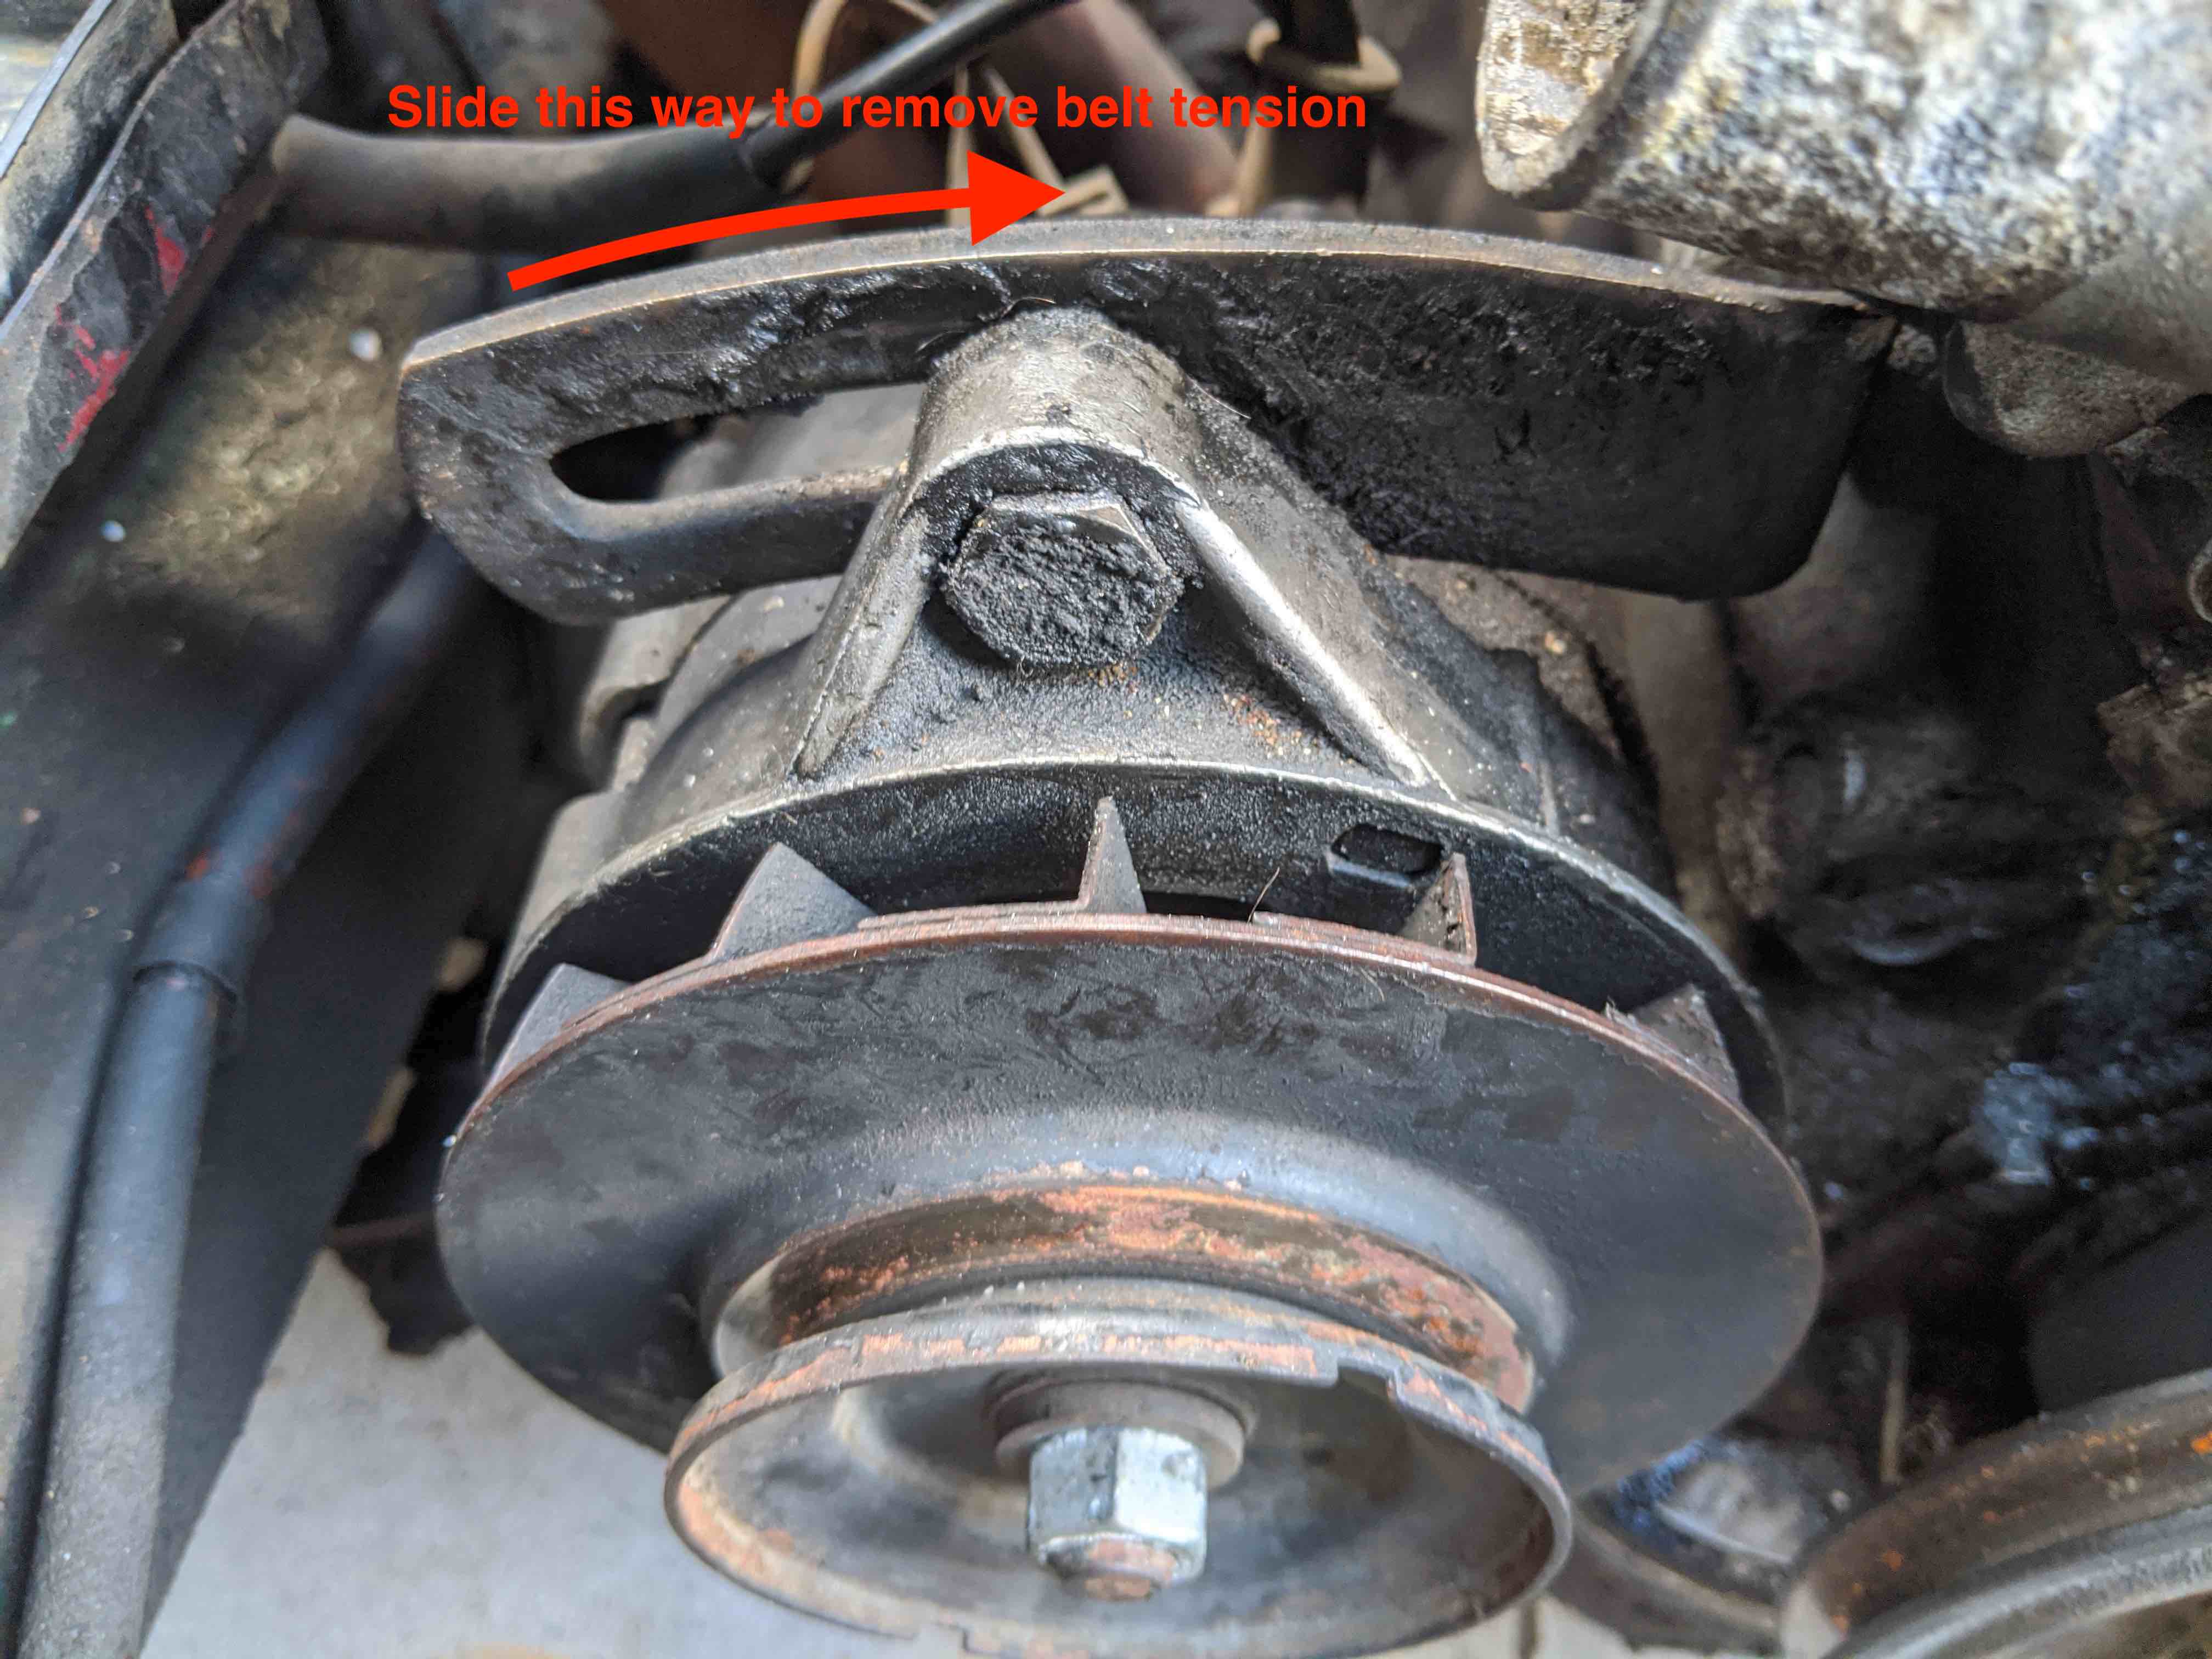
Once the radiator and coolant hoses have been removed, we can move on to the serpentine belt. This is the belt that drives the alternator and the water pump.
To remove the belt, you can loosen the belt's tension by first loosening the alternator mounting bolt and sliding the alternator its mounting bracket. Once the tension in the belt is loose enough, it can be removed by slipping it off of the alternator pulley.
Remove Battery and Spark Plugs
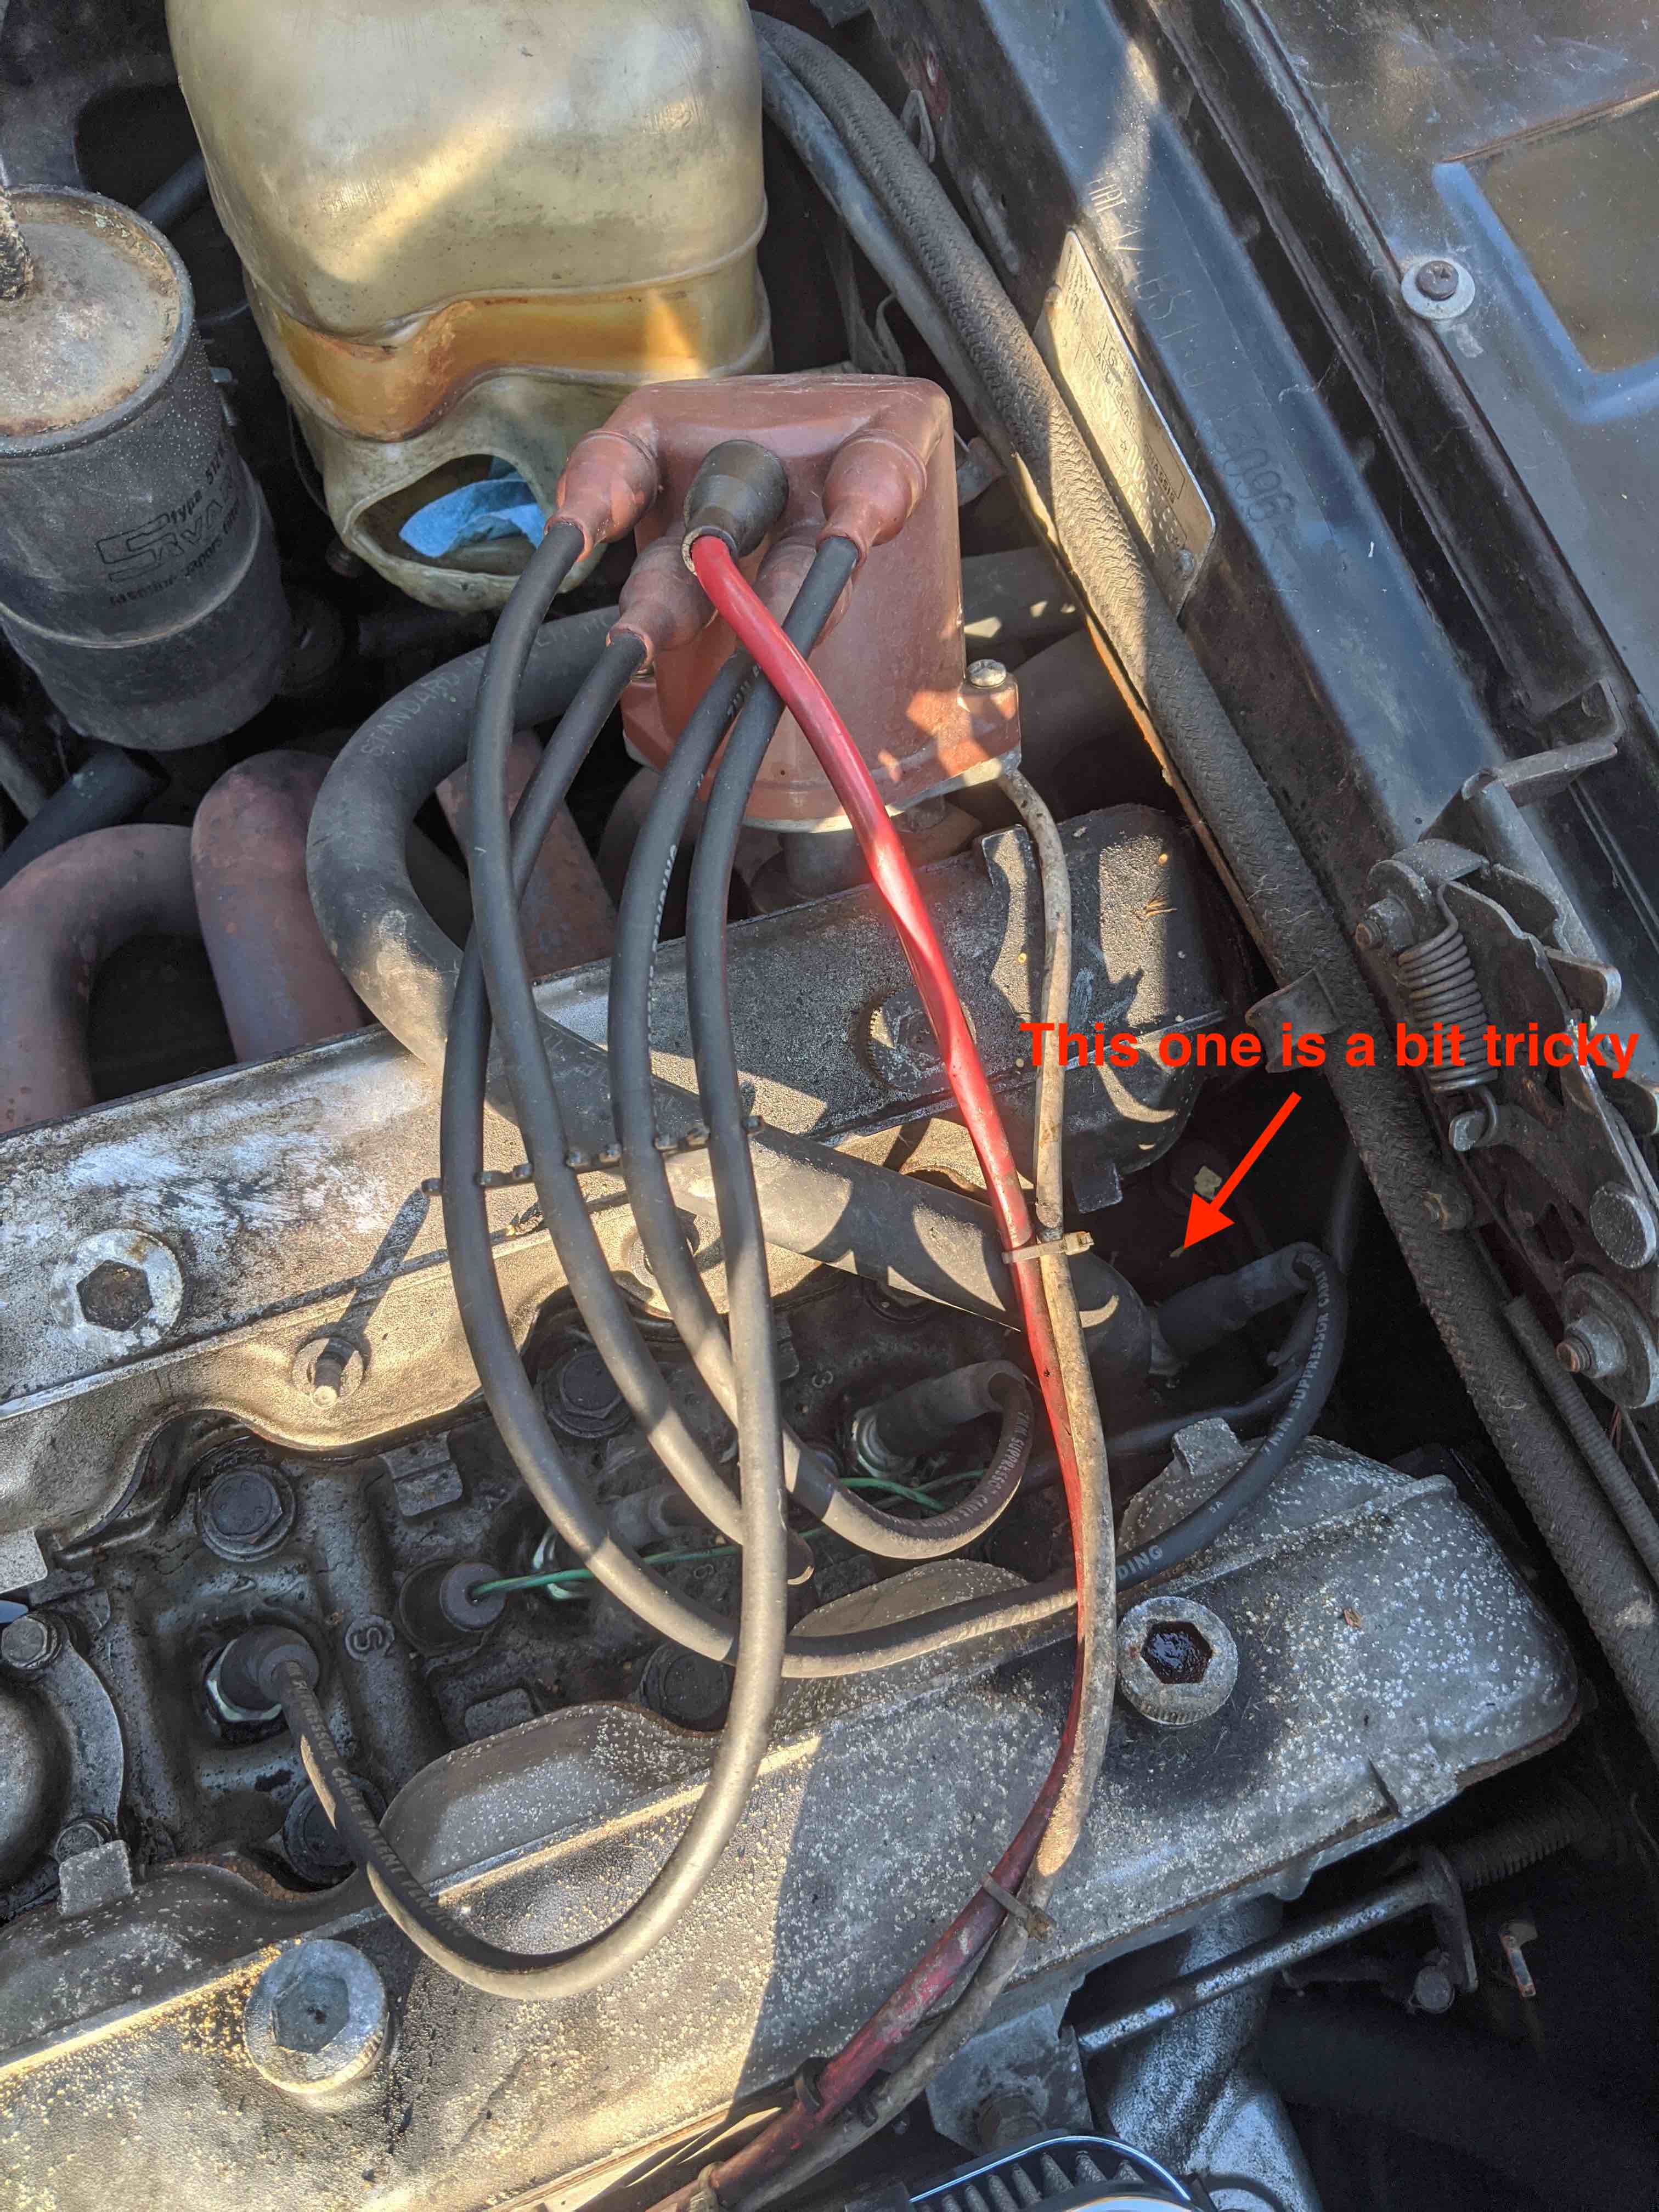
I then removed the battery and the spark plugs. I didn't have to do this just yet, but will did it done so we can freely turn the engine by hand. To remove the spark plugs, we just have to detach the spark plug wires and then remvoe the plugs with a plug socket. The furthest back spark plug is both angled and tucked in there pretty well. I found that it's easiest to get out with both an extension bar and a universal joint.
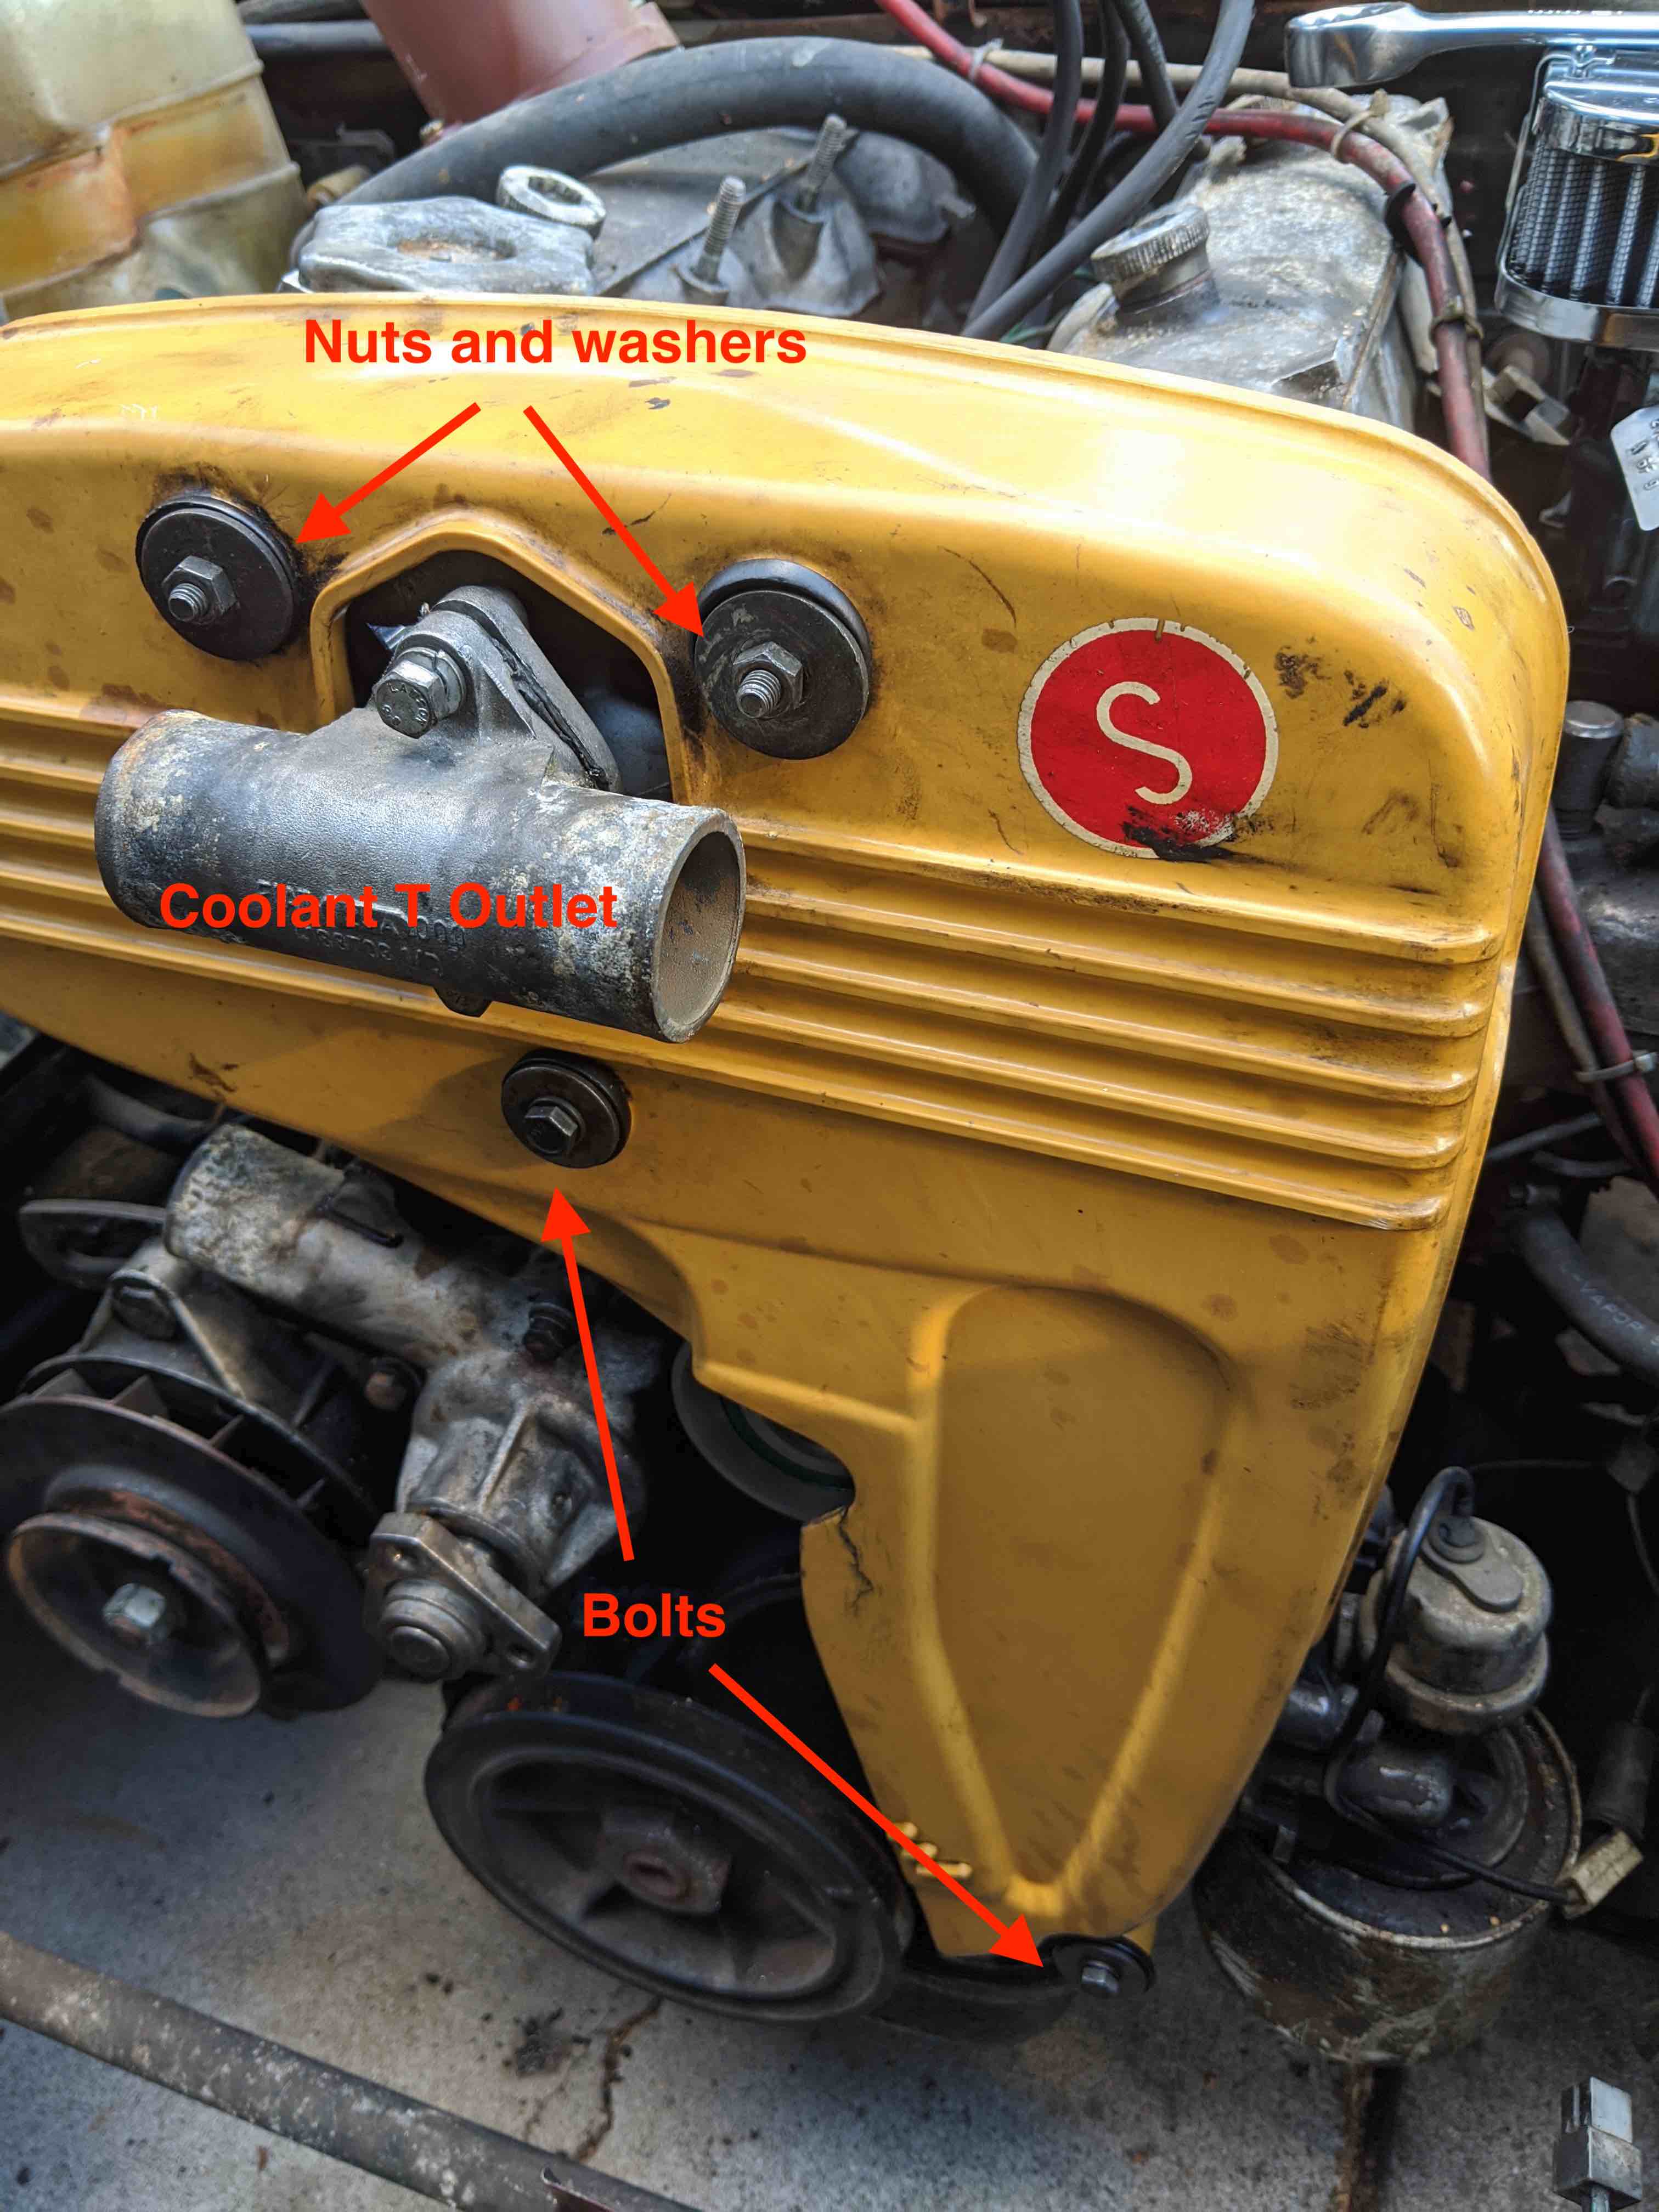
Remove Coolant T Outlet
The last thing in the way of the timing belt is the timing belt cover. This is the large yellow shield that's left on there. To get this off, we need to remove the coolant T outlet by removing the two 10mm nuts that attach it. The T outlet is mounted with a gasket, and we'll be sure to replace this with a new one when we put everything back together.
Remove Timing Belt Cover
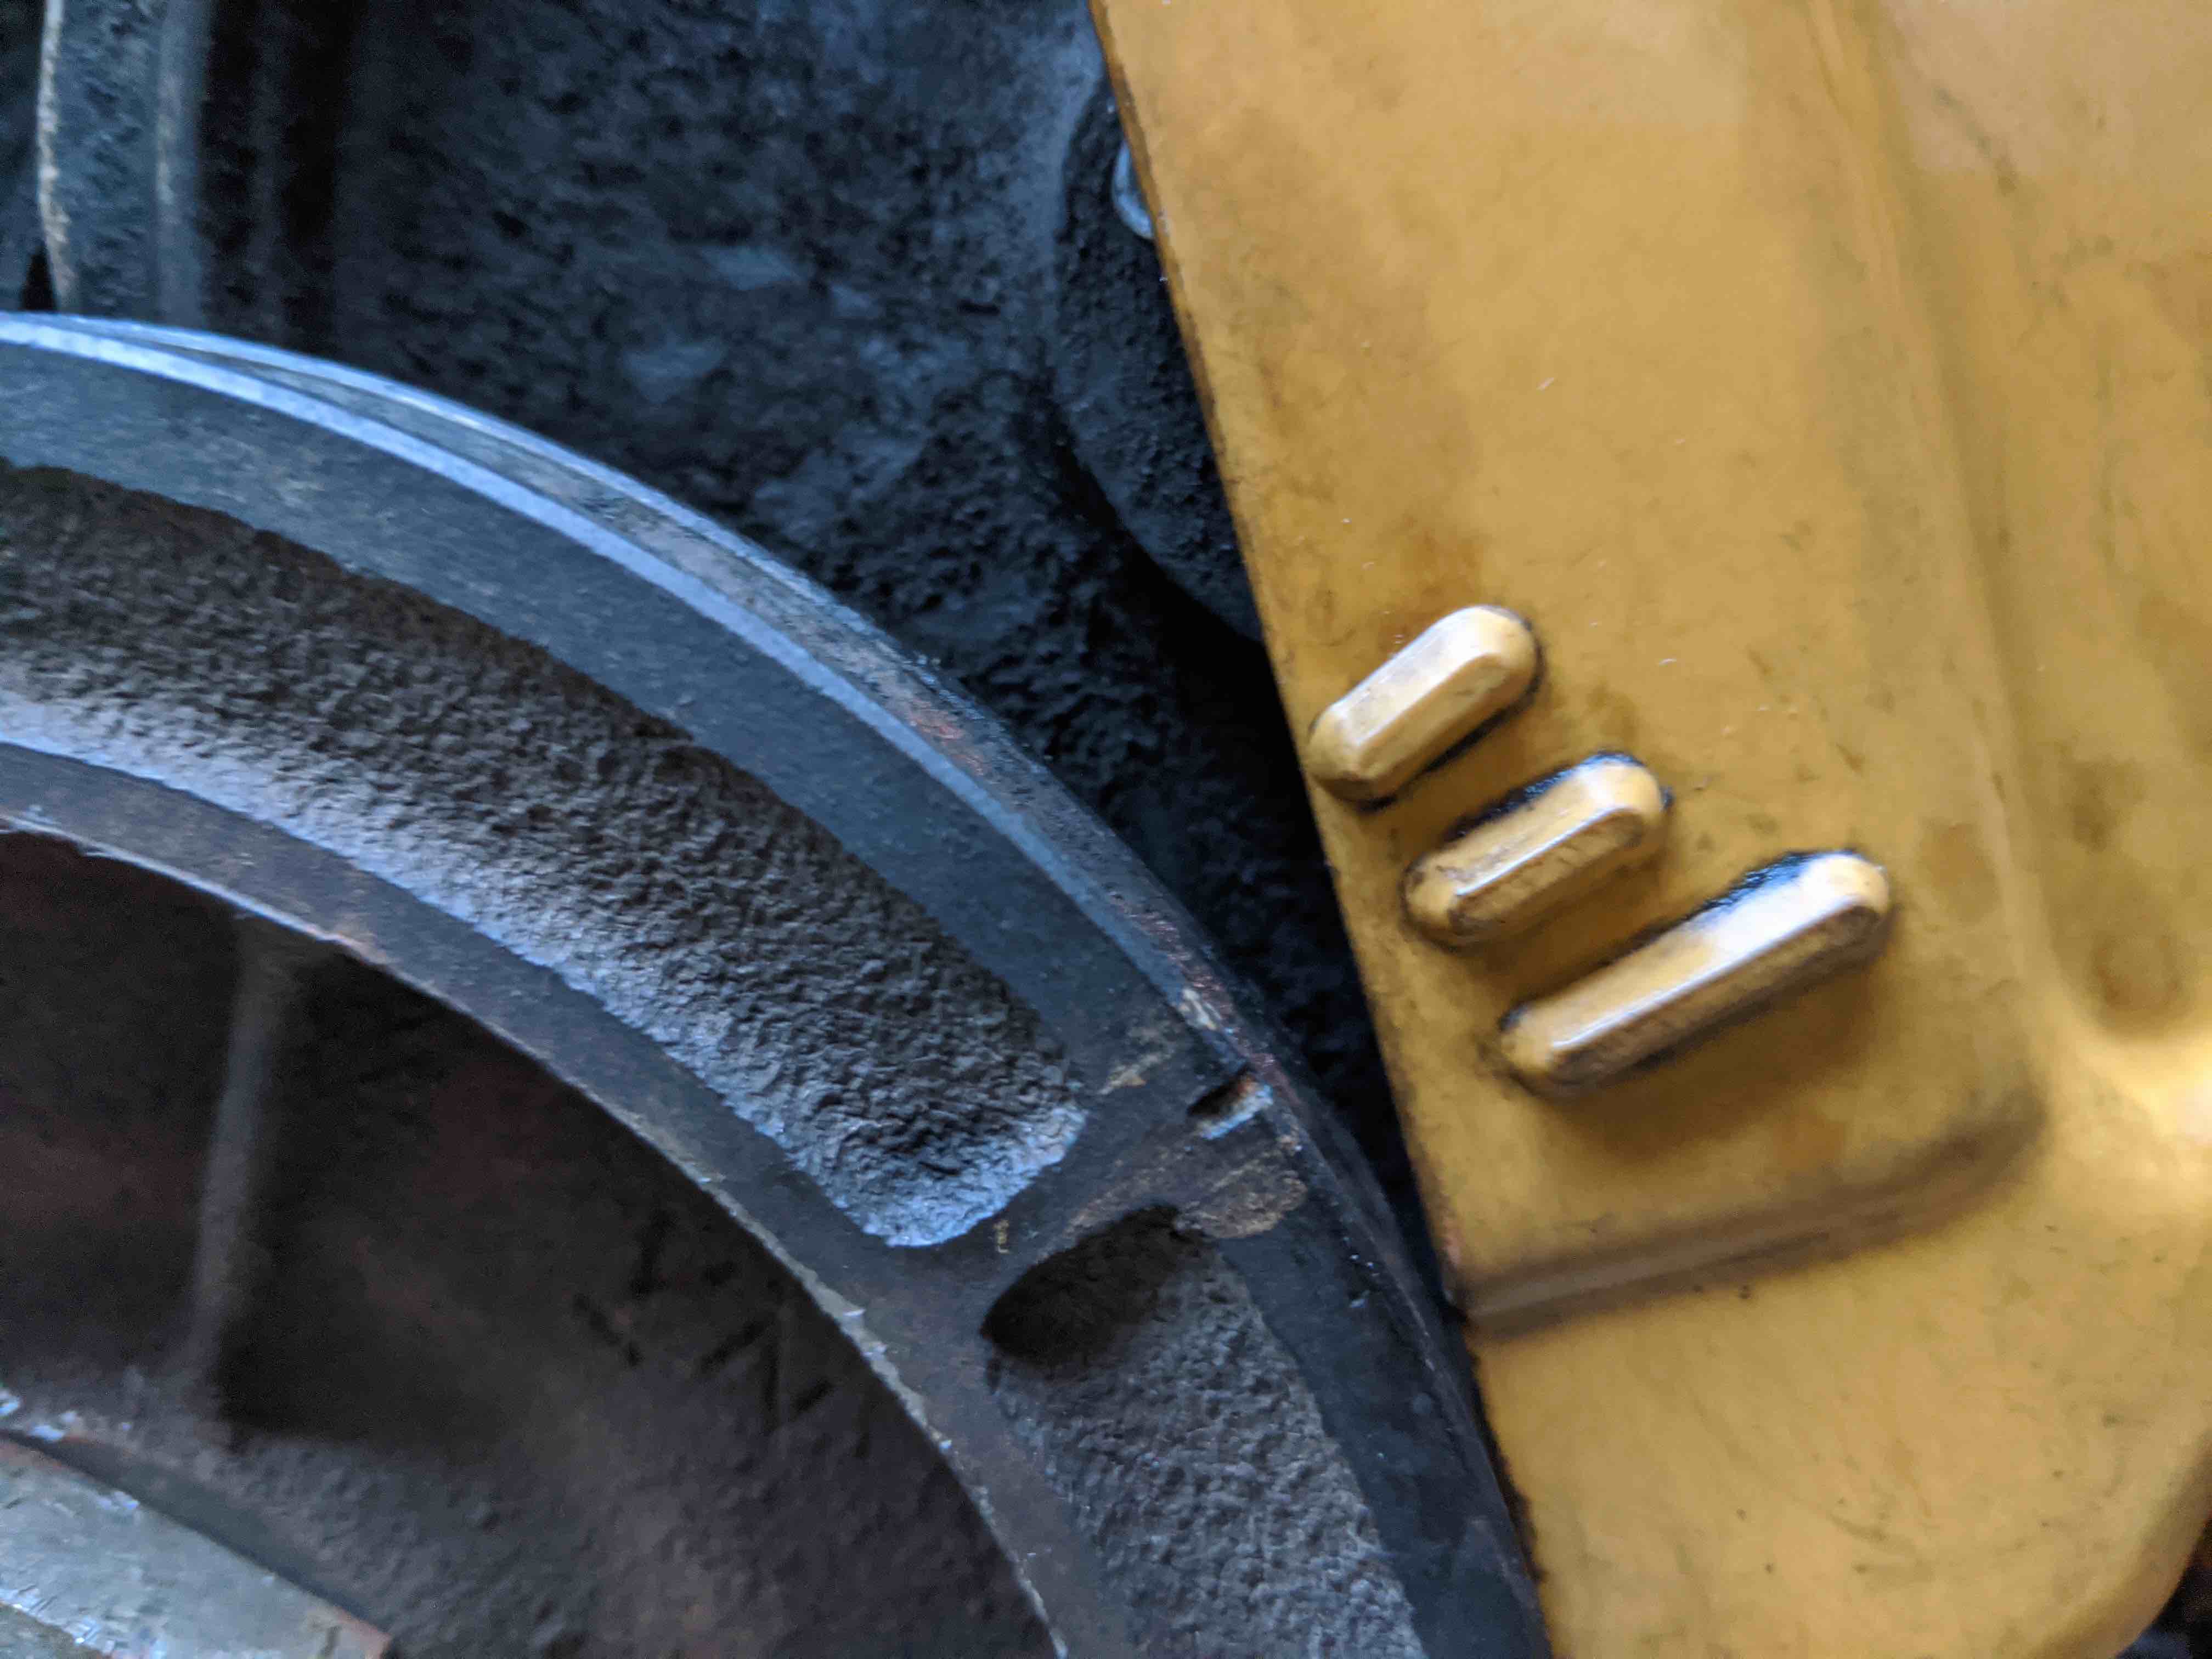
After removing the coolant T outlet, we can remove the cover itself. It's held on by a couple of nuts towards the top and several bolts spread around the body of it. The nuts have washers that should be removed and stored so they're not lost. The bolts have plastic inserts that slide into the body of the timing belt cover. These should also be removed and stored so they don't get lost if they slip out.
Line Up Static Timing Marks
With the cover off, I wanted to get the engine's static timing marks lined up before I kept going. Since the spark plugs have already been removed, we should be able to turn the engine by hand. We first shift the car into neutral, making to to engage the e-brake or chock the wheels. The crankshaft has a 38mm pulley bolt that can be turned clockwise to turn the engine. I ended up using a 1.5" socket since I didn't have a 38mm socket.
I unfortunately didn't take any pictures of this part, but there are timing marks on both camshaft pulleys, the crankshaft pulley, and the auxilary shaft pulley. I started by aligning the camshaft timing marks. There are two fins that point to where the camshaft timing marks need to be. Once the marks are aligned, we can double check that the timing is already as it should be by making sure that the first cylinder piston is at top dead center (TDC). We can easily do this by putting a long stick into the first spark plug hole (I used a straw), and making sure that the straw is lifted to its peak when the marks are aligned.
With the camshaft marks lined up, I checked that the crankshaft timing mark is lined up as expected as well. The alignment marks are on the timing belt cover, so we have to put that back on to check. There are three marks towards the bottom of the cover and ideally, the crankshaft mark will be aligned with the center mark. In my case, this is what I found, meaning the static timing was lined up properly. With that done, we could put the car back into gear in order to lock the cams.
With the static timing done, we should take a look at the auxilary shaft mark. It should be at around 1 o'clock or 34°. Regardless of where it is, we should take note of where it is to make sure it's in the same spot when we're done.
Remove the Water Pump
The next step is remove the water pump. This isn't a completely necessary step but it gives us more space to work with and was also due a replacement, so I took it out. There are three bolts that mount the belt pulley onto the pump. These have to be removed first so we can get to the pump mounting bolts. The heater pipe connects to the back of the pump and has to be disconnected as well. There are two gaskets that we need to replace: one connecting the water pump to the engine body and one connecting the water pump to the heater pump. After removing the water pump, I cleaned all of faces that will get a gasket replacement later.

Replace the Tension Bearing
After removing the water pump, we can finally get onto replacing the timing belt! With the belt off, we also have easy access to the tension bearing, so I replaced this as well.
The first thing we want to do is loosen the two bolts that tighten the swivel and the spring. The spring is what forces the tension bearing towards the driver side of the engine bay and tensions the belt. By loosening these bolts, the spring can be compressed in order to release tension on the belt. I released the tension in the belt by disengaging the compressing the tension bearing spring.
To do this, I first used some mini clamps to clamp the belt to the camshaft sprockets so it wouldn't travel. I then used a pipe clamp to pull the tension bearing mount towards the engine to disengage the tension. This seemed to work reasonably well and I was able to remove the 17mm bearing mount bolt, remove the washers and bearing, and replace the bearing. The tension bearing mount bolts need to be torqued to 30 lb-ft!
Replace the Timing Belt
With the new bearing in place, I could move on to the timing belt. Looking back, I probably could've just done the timing belt at the same time as the tension bearing, so maybe I'll try that next time.
For the timing belt, I wanted to lock the camshafts in place so they wouldn't travel when I was in between belts. I tried several camshaft locking tools but couldn't find any that actually worked with the placement of the camshafts and the coolant T outlet. I found a trick in a forum that I tried out instead. To be honest, I don't think it worked very well and I will be looking for a different method the next time I have to do this.
What I tried was to carefully cut the existing timing belt in half, lengthwise, so half-width belt was still installed. The half-width belt locked all the sprockets in place and left just enough space to place the new belt. The idea is that you can slide the off ony off as you slide the new one on. It theory, it sounded simple, but in practice, it ended up being super tough.
Check Static Timing
Once the new belt is on, the tension bearing can be released to provide tension to the belt and retightened to tension the timing belt again. Once this is done, the static timing has to be checked again. First check that the camshaft timing marks are lined up as they should be, with fins pointing at the little holes. Then, replace the timing belt cover and ensure that the center timing mark is lined up with the mark on the crankshaft. Finally, ensure that the auxilary shaft timing mark is at 34° or 1PM.
For me, this wasn't the case. My crankshaft timing mark was off!

Fix Static Timing
Since it wasn't timed properly, I had to remove the timing belt cover, loosen the belt tension a little, and progress the crankshaft a tooth to try to get it timed properly. I ended up having to do this a bunch of times and it took me several hours on multiple days to do. Either I would progress the crankshaft too much, or I would get it just right but a camshaft of the auxilary timing would be off, or multiple timings would be off.
I ended up having to use my mini clamps again to clamp the timing belt to the camshafts to ensure that those didn't travel. With two pairs of hands, we were eventually able to hold the auxilary sprocket to the belt and adjust the camshaft timing just right!
When everything was finally timed properly, it was finally time to make sure it's correct. With the tension bearing applying tension and tightened, I put the car in neutral in order to turn the engine. At this point, the spark plugs were still out of the car.
Turn Engine Twice
I took my 1.5" socket and a breaker bar and turned the crankshaft slowly. To ensure that the timing is safe enough to try, you have to be able to make two full revolutions of the crankshaft. Two full revolutions ensures that each cylinder is able to go through what would be all four strokes. Since we're working with an interference engine, mistiming could lead to a valve hitting a piston which could cause extensive damage to the internals of the engine.
For good measure, I went around four times and to my surprise (and relief), had no issues. That marked the end of the timing belt change, and the rest of the work is to put everything back together. The work here was more or less the reverse of what we had done before.
Double-Check Everything and Reinstall Belt Cover and Coolant T Outlet
Before I put the timing cover back on for the last time, I double-checked that the tension bearing was torqued properly (30 lb-ft), and quadruple-checked that the camshaft timing marks are all in place. I put the timing belt cover on and then moved to the coolant T outlet. Using a new gasket, I installed the coolant T outlet after cleaning it up a bit.
Replace Water Pump
For the water pump, I did more or less the same thing. I cleaned up the faces that would take new gaskets and installed the pump with the new gaskets. There was a new gasket for the heater hose connection and one for the engine block connection. Once it's back in plcae, I installed the water pump pulley to the new water pump.
Reinstall Serpentine Belt
The serpentine belt was just doing the opposite of what we did to take it off. The alternator was already moved down on the slide mount, so I was able to slip the serpentine belt over the crankshaft, water pump, and alternator easily. I then pulled the alternator over on the slide mount in order to tension the belt and tighten the bolts to keep it in place.
Reinstall Cooling System
I reinstalled the cooling system, which was just reinstalling the hoses and radiator, and then regilled the system. For now, I just used distilled water, which is sufficient since I still have work to do on the car before I'll be taking it out. Once this was done, I reinstalled the battery and I was just about done! Before the spark plugs went back in, I gave the engine a few more turns to just be certain that no valves would hit. I reinstalled the spark plugs (read the torque spec!) and I was finally done!
At this point, it was several weeks after I had started. This took me so long for a couple of reasons, many of which I should be able to smooth out next time.
- The tension bearing bolt wasn't catching when I tried to reinstall, so I had to get a replacement
- My first camshaft locking tool didn't work
- My second camshaft locking tool didn't work
- It took me a several days to get the static timing right
- I forgot I needed to replace the coolant T outlet gasket, so I had to order one
- It took me several days to gain the courage to try to start the car
Turn on the Car!
Eventually, I gained the courage to try to turn over the car! And...
...it didn't work!
"Why?" you might be asking, "How could it not have worked after this (in)experienced (non-)mechanic did this so (im)perfectly?!"
Well, despite it not working, there's some good news here. The good news is that the starter motor worked and successfully turned the engine with nothing breaking. This meant that the timing was fine, at least to the extent that it didn't break anything. This was a huge relief.
That being said, the car didn't turn over so there was an issue to diagnose.
Long story short, I managed to diagnose and fix the issue. It ended up being a fuel delivery issue (check it out here), and what I found especially funny is that the cause of the issue may have been that it took me so long to do the timing belt change. If the timing belt change didn't take so long, the fuel issue may not have come up.
Anyways, I managed to turn the car over and it seemed to run just fine. So that's it for the timing belt! See you again in 60k miles!
Still interested? Go back to the Project Car page and check out how other things work!