Project Car
Project: Replacing the Master Cylinder
As a part of performing an overhaul of my brakes, I replaced the master cylinder. This ended up being a much simpler procedure than I expected.
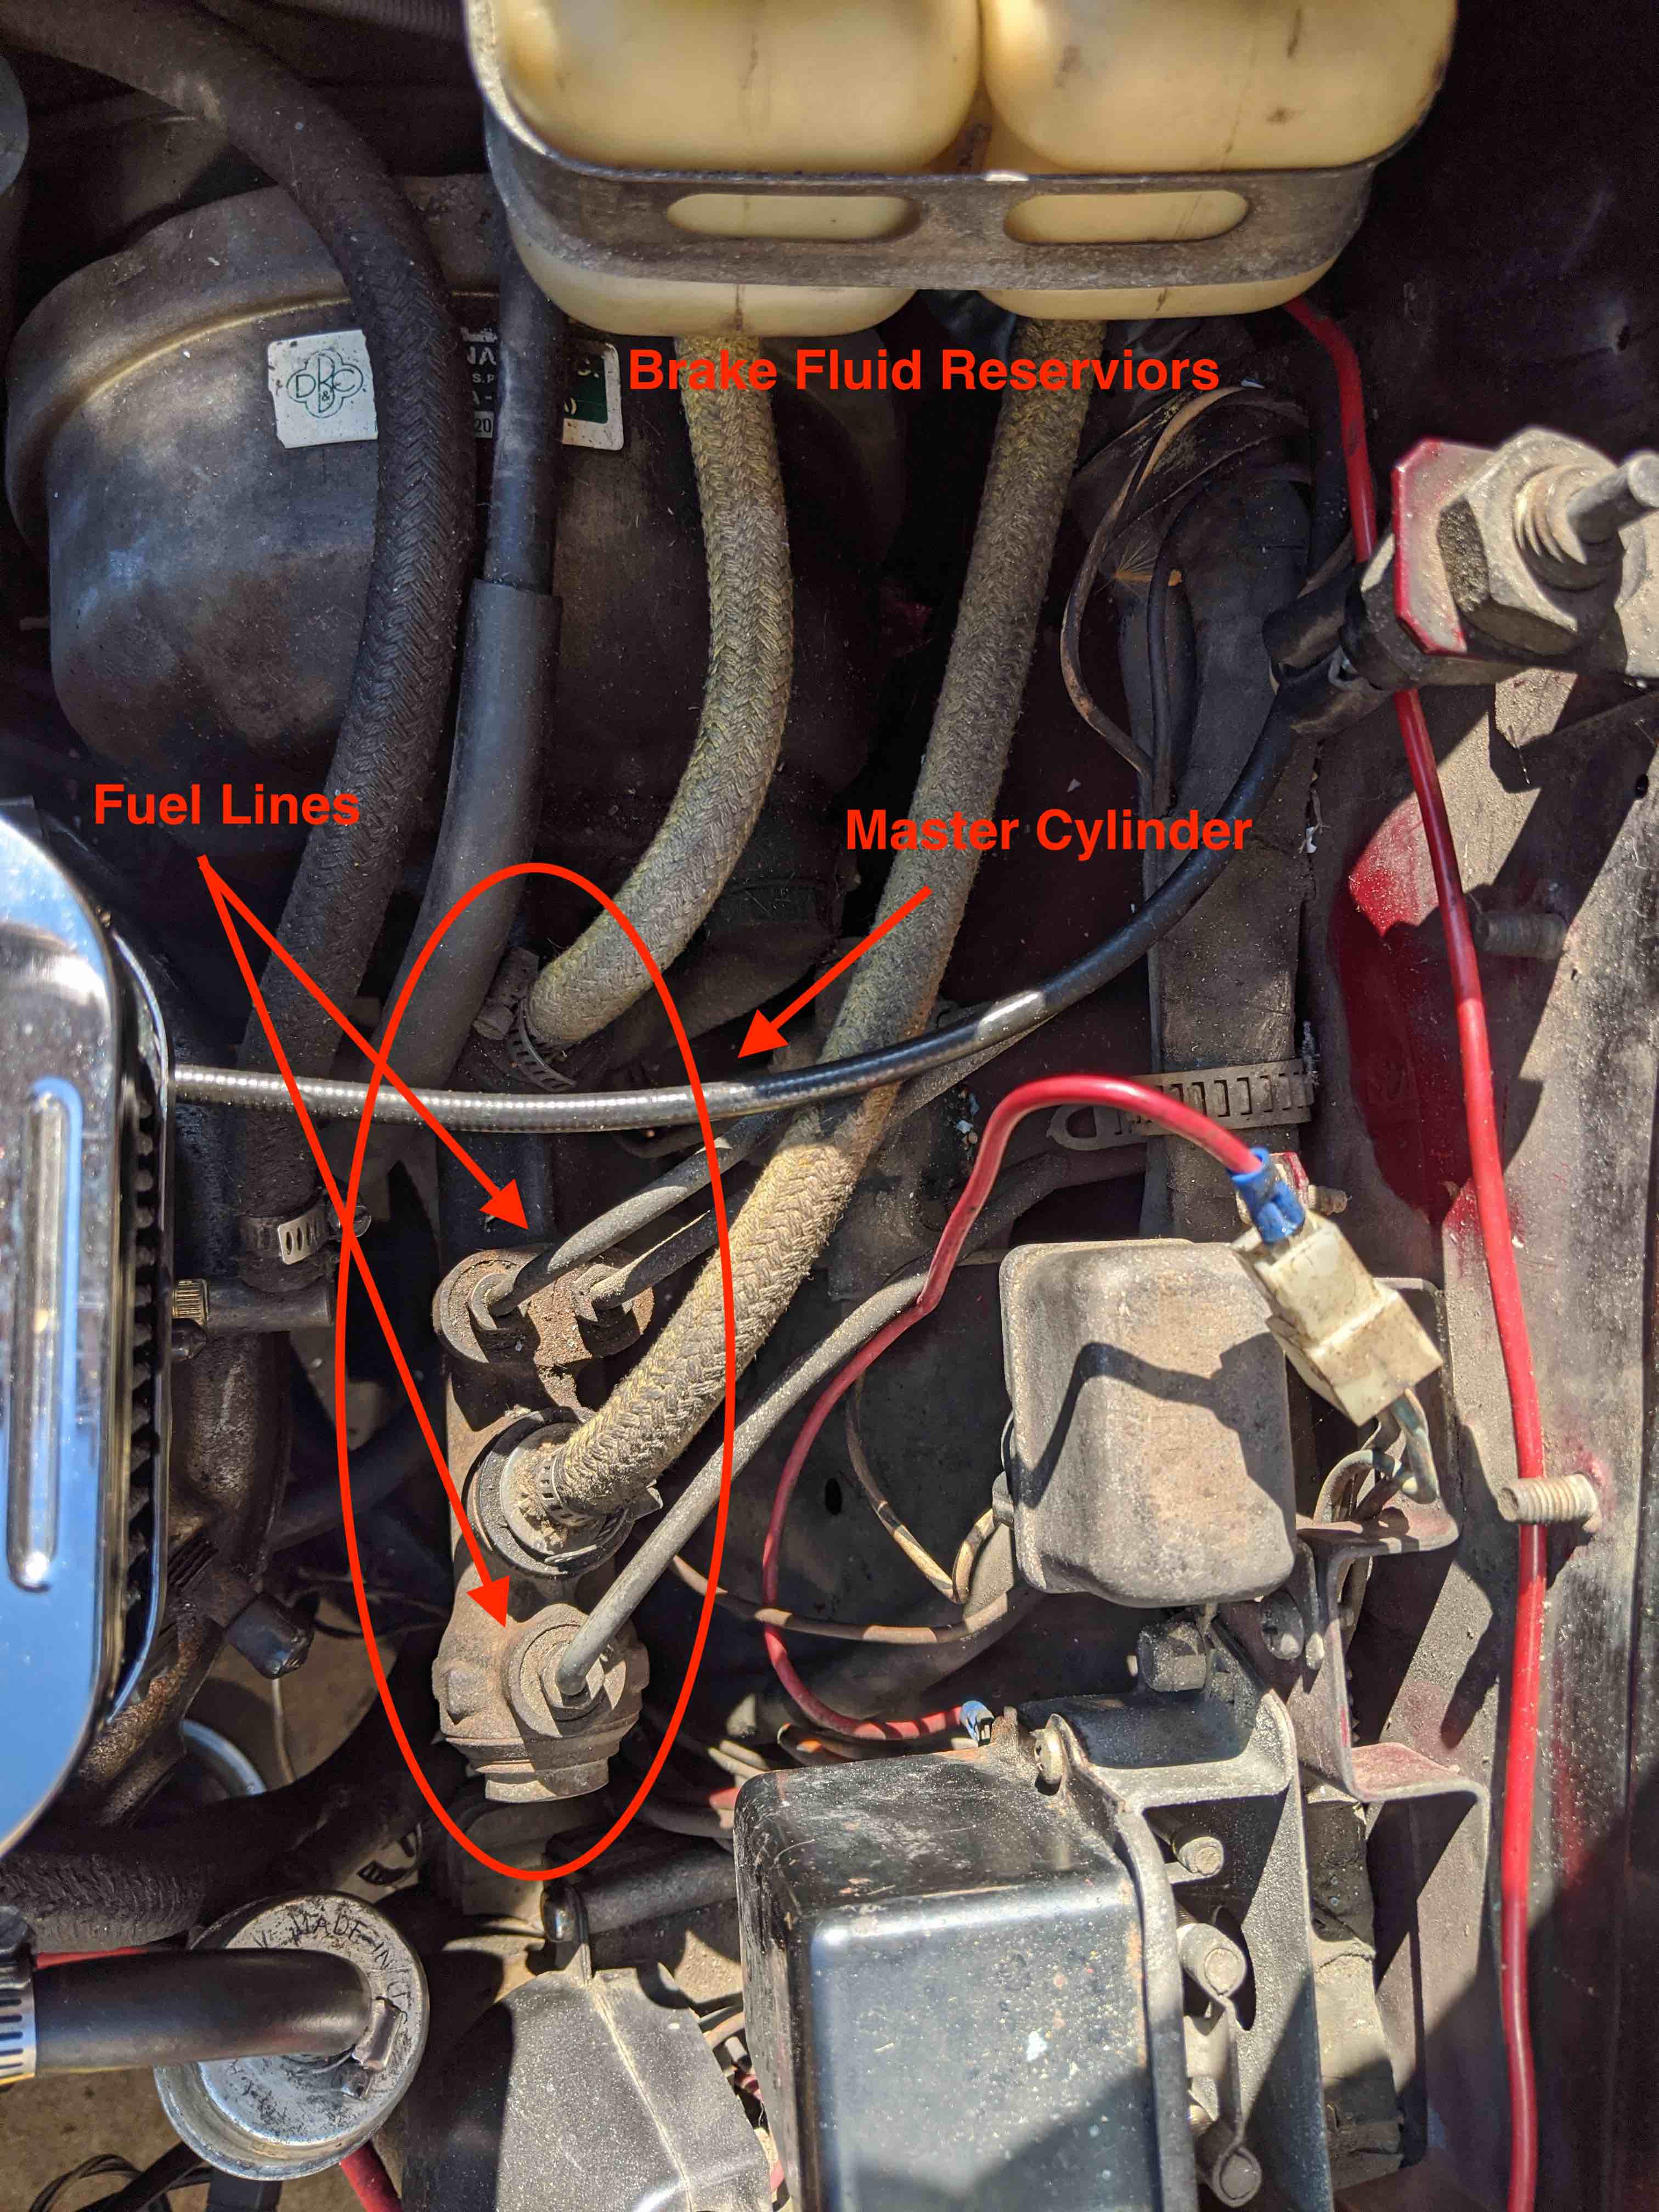
When we do this, we'll have to disconnect the brake fluid reservoirs from the master cylinder, which would cause the fluid to spill out. In my case, since I'm replacing more of the brake system, and will replace all the fluid, I just emptied the reservoirs completely. Otherwise, you can open the reservoirs, cover the opening with plastic wrap and then close it back up. This will help minimize the amount of lost fluid by not letting any air into the reservior.
Once that's taken care of, we can disconnect the hoses to the brake fluid reservior. These are held on by small hose clamps. I'll be replacing the hoses soon, but I hadn't ordered them in time, so they're not shown here. With the hoses disconnected, we can move onto disconnecting the brake lines. For this, make sure to use a flare nut wrench to make sure to not round off the nut.
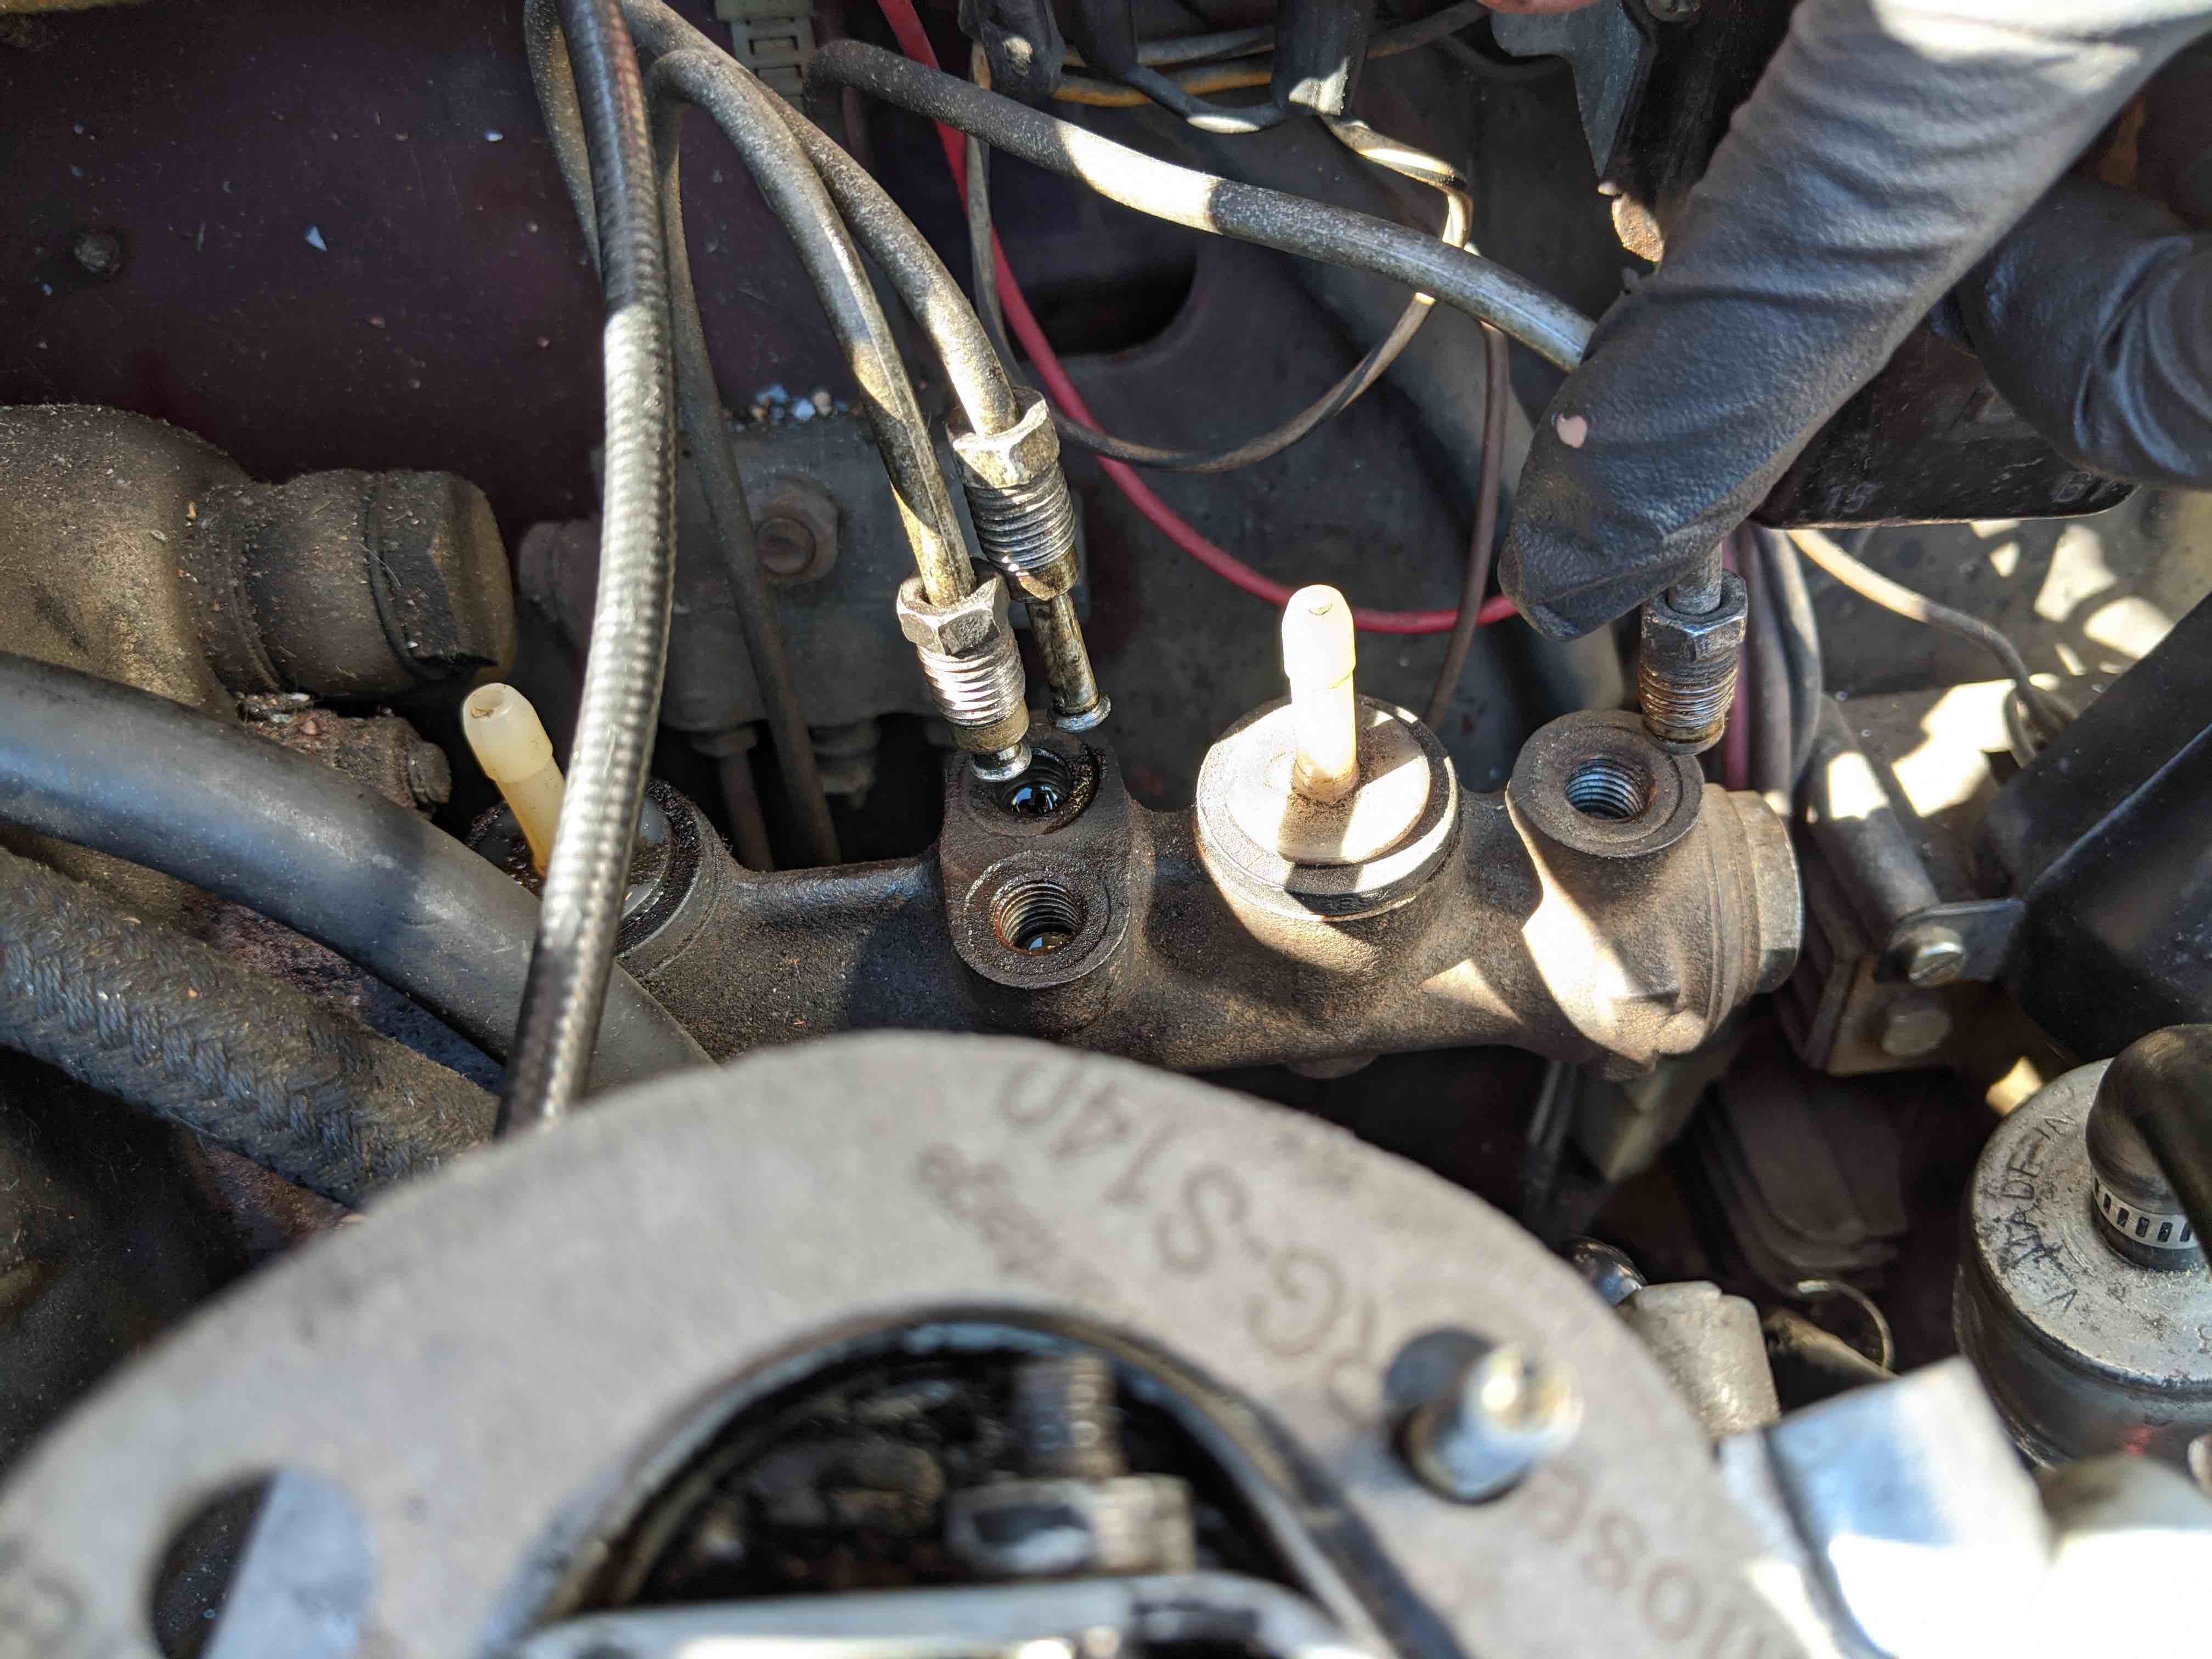
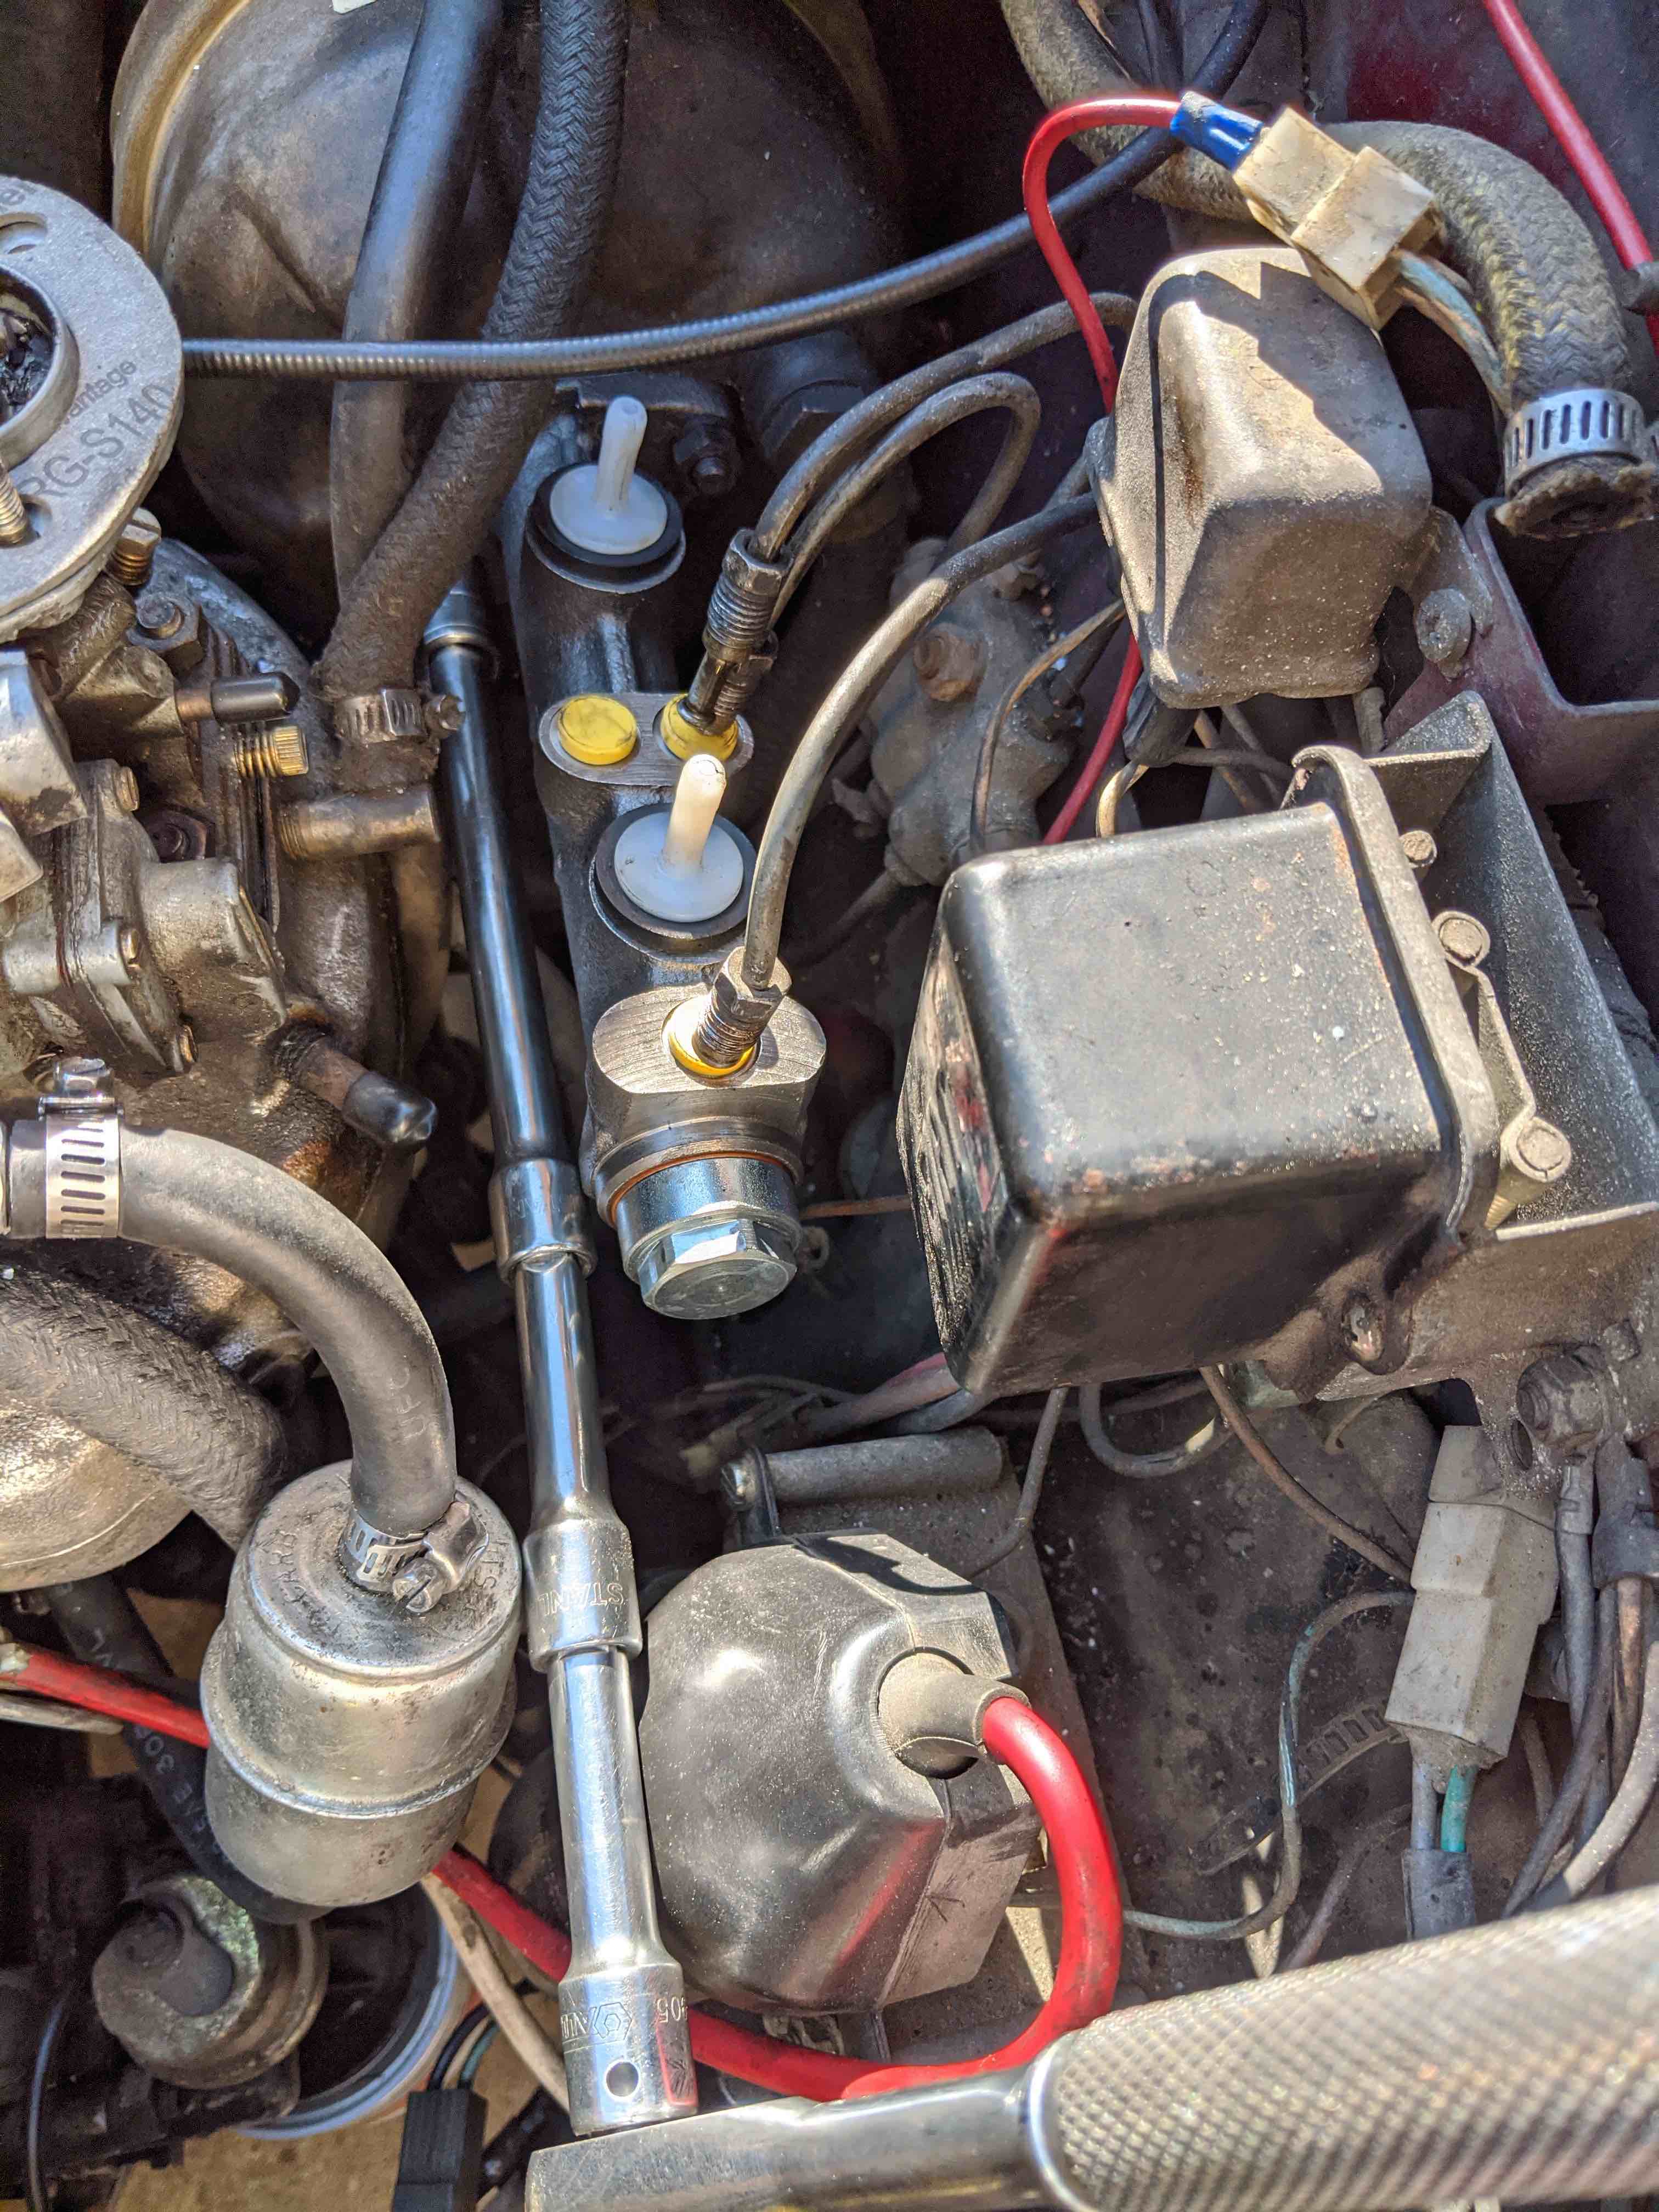
Once the hoses and lines are disconnected, we can detach the master cylinder from the brake booster. There are two nuts at the base of the master cylinder that connect it. This ended up being quite a struggle for me due to position of the nuts and the lack of space. Once it's out, we can replace it with the new one. I found a much better way to access the nuts while reattaching! I found that I could get to them with much less difficulty if I attached a few of my socket extenders back to back.
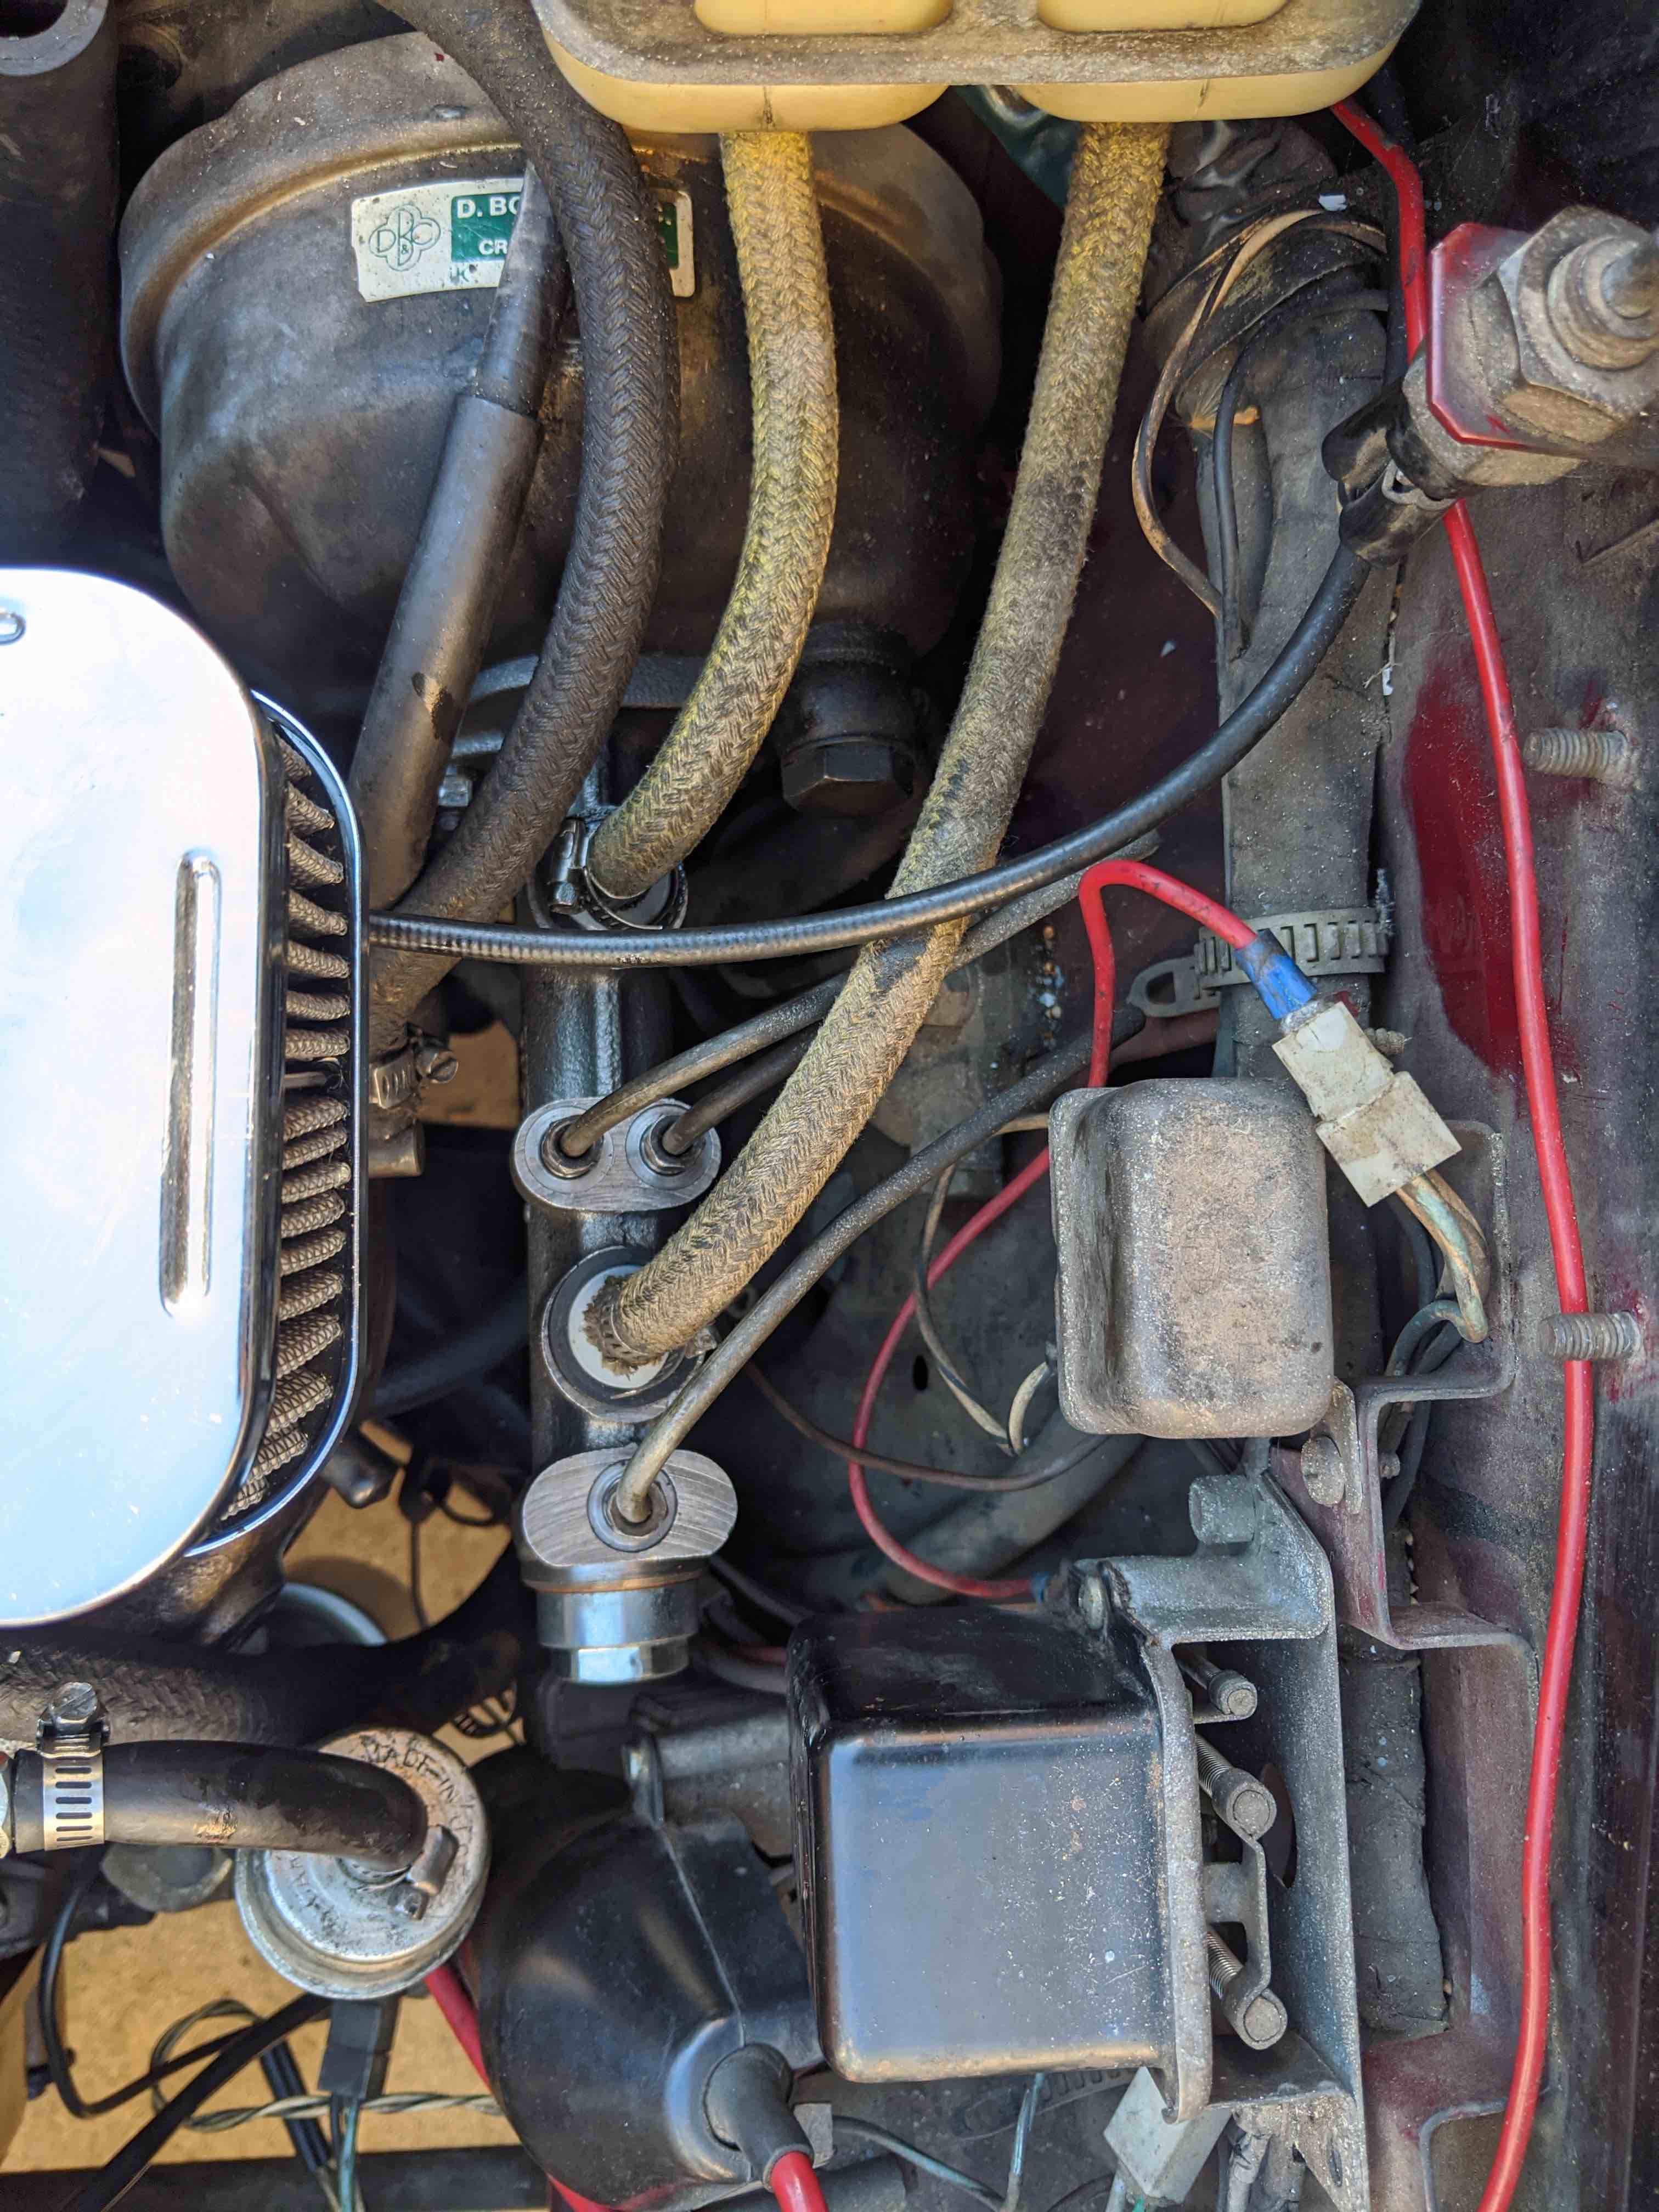
From here, we just have to reconnect the brake lines (with a flare nut wrench), and then reattach the reservoir hoses and we're done!
Still interested? Go back to the Project Car page and check out how other things work!